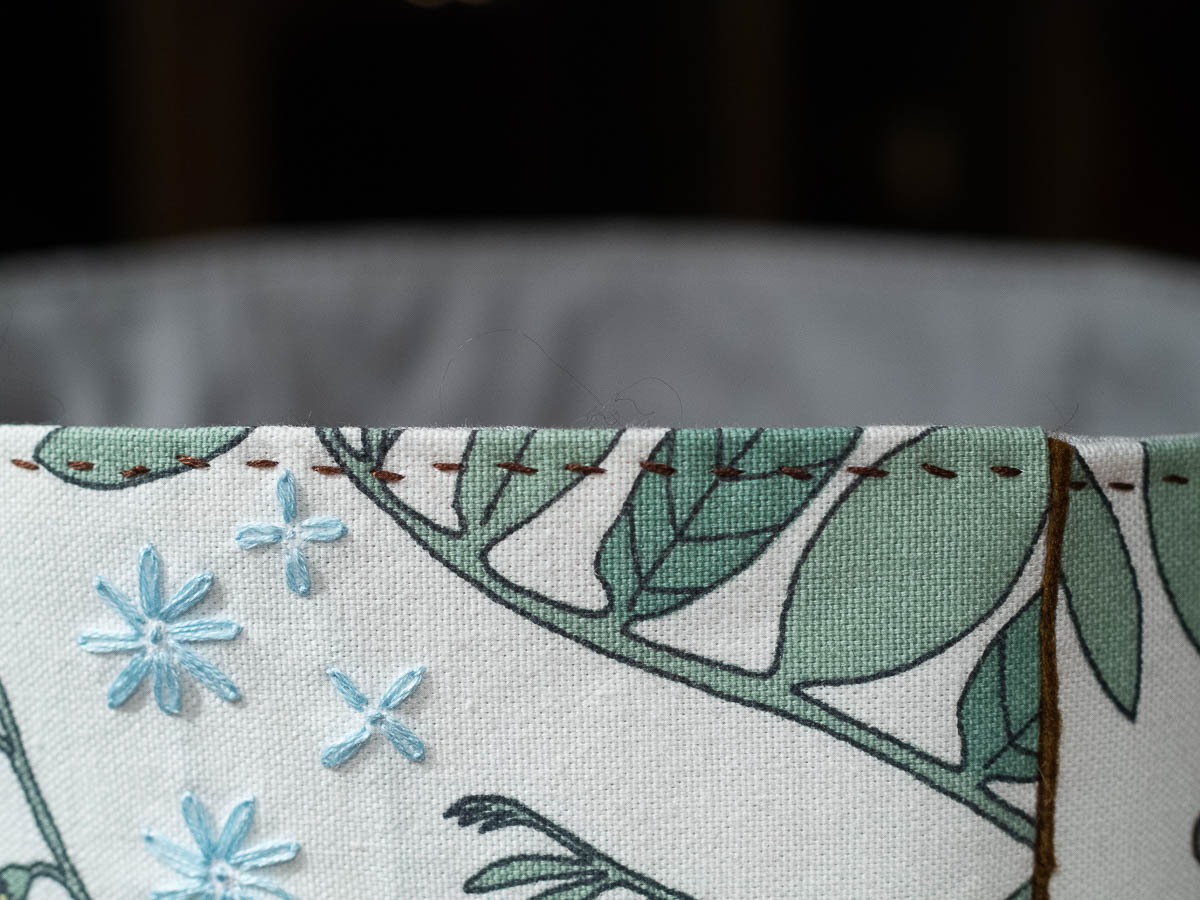
Lining attached, piping trimmed, top-stitching added.
Now I need to think of something to put inside it.
Learning point for next time: a padded lining takes up space, so for a perfect fit, it should be smaller than the outer walls.
Lining attached, piping trimmed, top-stitching added.
Now I need to think of something to put inside it.
Learning point for next time: a padded lining takes up space, so for a perfect fit, it should be smaller than the outer walls.
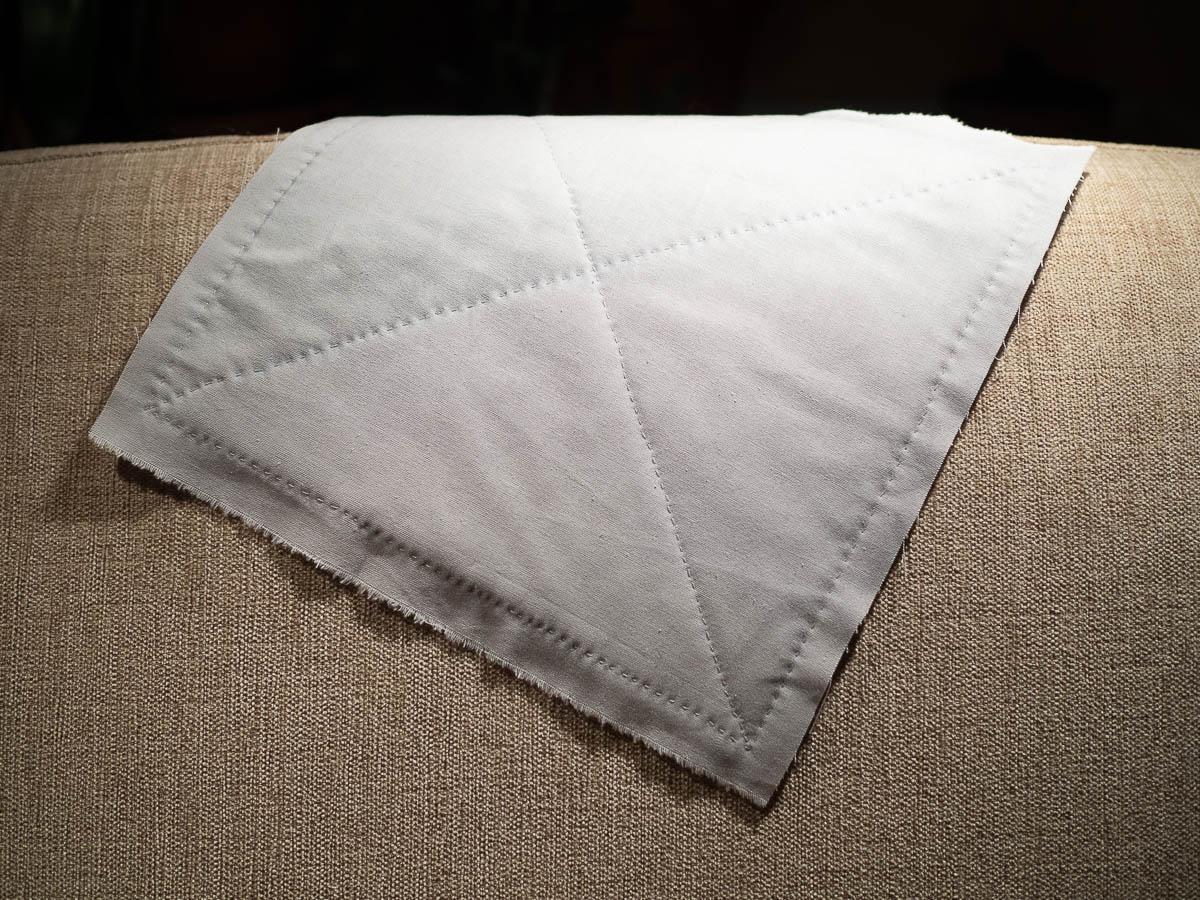
This is going to be one seriously over-crafted storage box. Just attaching the lining to the padding means meters and meters of hand-stitching over many, many evenings. The effort is out of all proportion compared to the artistic merit of the embroidered panels that started it all, or the cheap materials.
Thinking of it as stitching meditation, though, it’s a perfectly good use of time. The fact that I’m producing something potentially useful and decently pretty is a side effect.
I always wear out the elbows on my cardigans. I am very aware of it when I’m wearing any of my hand-knitted cardigans, and try to keep my elbows off my desk, but I’m sure I’ll still end up wearing through them.
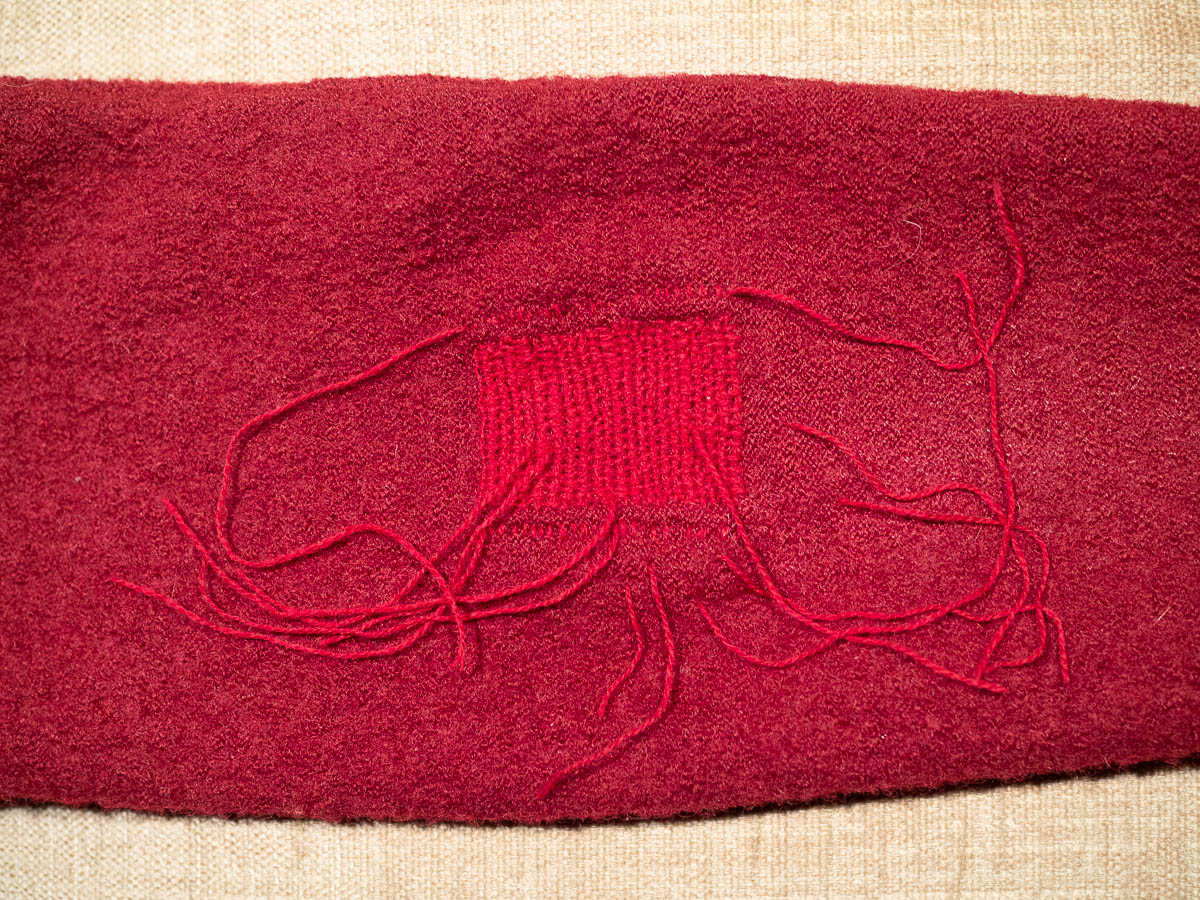
I’ve sewn on leather patches on two of my cardigans. For this one I didn’t think the leather look would be a good match, and I find it difficult to get ordinary darning to look even in larger sizes, so I looked for an alternative. (Good thing I have books about mending.)
One of the books described Scotch darning as a good fit for elbows – sturdy and hard-wearing. It’s effectively blanket stitch over weft yarn. I tried it out and it came out really well, if I say so myself. Sturdy and even.
What I discovered, and wish the book had told me, was that the weft threads should have more distance between them than for normal darning. Because effectively you’ll be fitting another thread in every gap between the weft threads. Mine ended up too densely packed and I sometimes had to stitch around two of them at the same time, to fit my stitches in. I ended up with some thicker wales here and there, but you can’t see it from a distance.
And it took so much yarn! That’s why there are so many ends to weave in. I had small hanks of embroidery wool specifically for mending, one of which was a lucky colour match for the cardigan, and it ran out just as I finished. I used up the whole hank for this one patch. I could have done another row if I’d had more yarn, where the fabric is thin but not quite worn through yet.
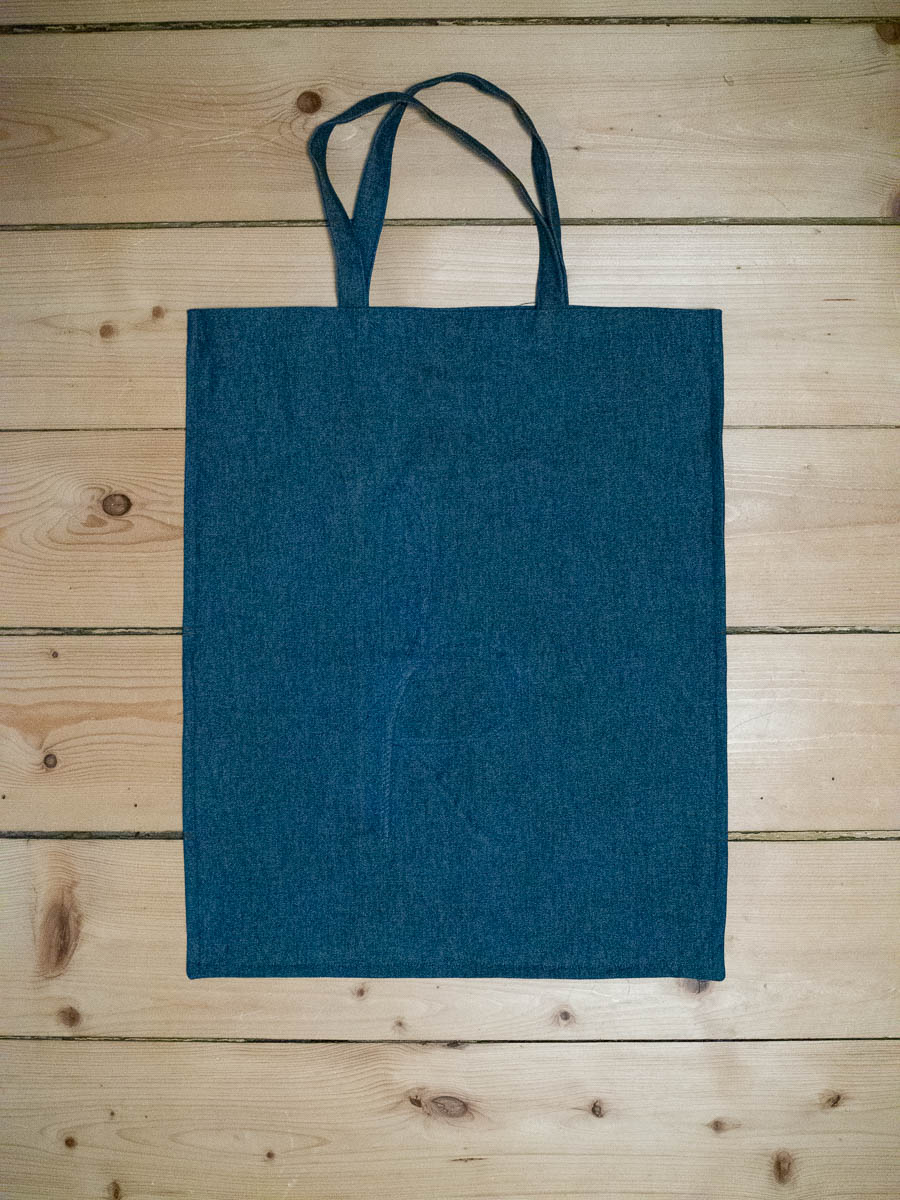
Sewed a grocery shopping bag to give away as a birthday present. It has a very subtle machine-embroidered letter “k” that I now see is nearly invisible in the photo, despite being quite large.
I expected this project to take about an hour, but it took almost exactly twice as long. I even did some estimating – and was still way off.
Measure, cut, sew edges, sew edges once more for an enclosed seam, pin top hem, sew top hem, measure handles, cut handles, sew handles, attach handles. 10 steps, say 5 minutes each, that’s 50 minutes, round up to an hour.
The zigzag embroidered letter was a last-minute afterthought, but that wasn’t the thing that made the whole project take so much longer than expected. No, it was totally ordinary work that I had simply not accounted for – some of which I might have expected if I had planned more carefully, and some that came out of nowhere.
Ironing the fabric (and setting up the ironing board, and waiting for the iron to heat up, etc etc). Piecing together one of the faces of the bag out of two separate pieces because the fabric scraps I had were too oddly shaped. Folding the top hem, twice, in a stiff fabric. Measuring for the placement of the handles. Fighting with the sewing machine when sewing over the place where the handles attach to the body of the bag and there are like seven layers of fabric to punch through. Refilling the bottom bobbin when it ran out of thread. Fighting with the machine again when it made crazy tangles after I replaced the bobbin, because the top thread had gotten out of one of the hooks it needs to run through, without me noticing.
Estimating is hard. It’s a good thing I was in no hurry. The birthday in question isn’t until Sunday – oodles of time left! – so this didn’t matter at all. And the end result looks pretty nice, even though it’s not very photogenic.
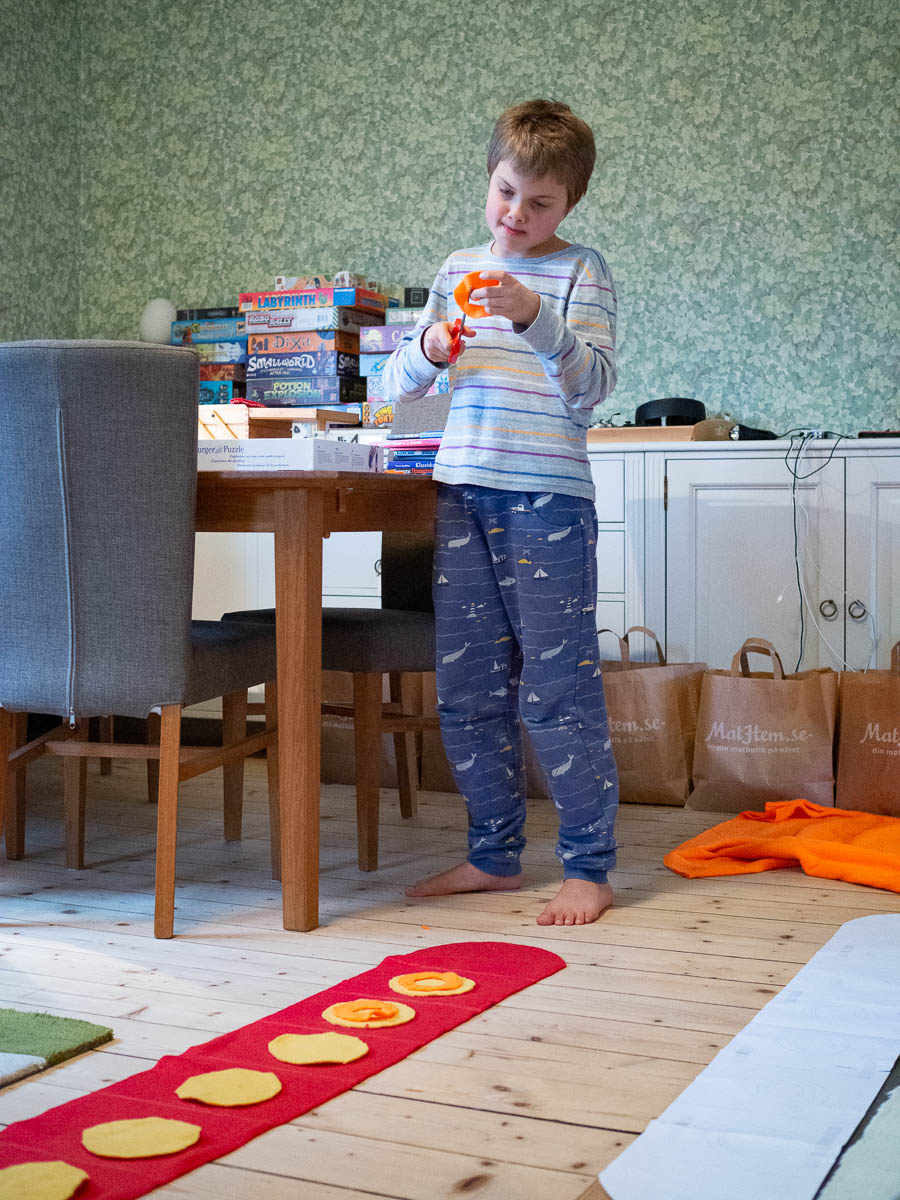
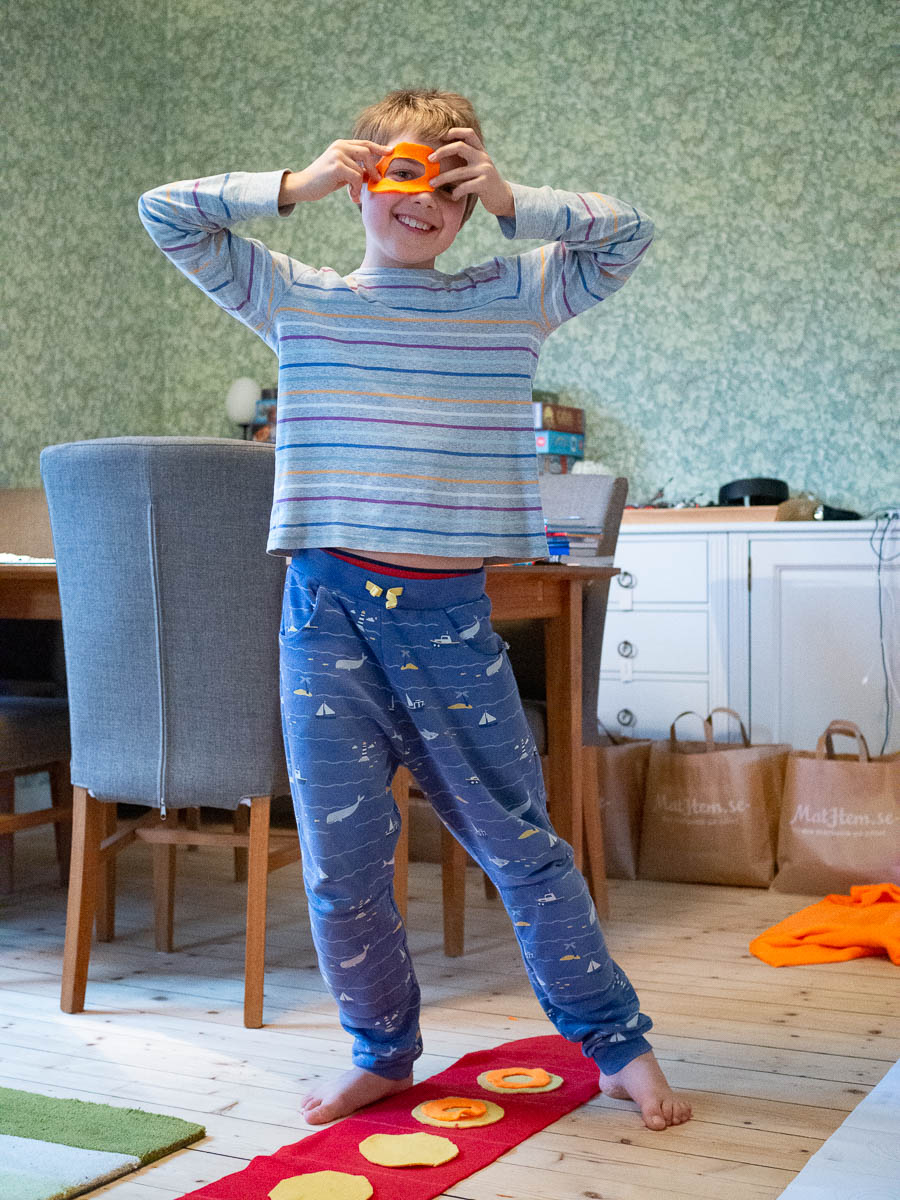
Textile crafts class at school has progressed from weaving friendship bracelets to actual real sewing. Adrian has taken a “sewing machine license” which allows him to use the sewing machines at school without supervision. He loves it, and has already sewn a fleece hat that he is very pleased with.
The hardest part about sewing is finding a suitable project. Adrian wants to make a Pokemon plushie, but most of the photos he finds on the internet have no pattern, and they’re too full of complicated 3d shapes for him to wing it. Like Snom with all its spikes, for example. But Centiskorch, another of his favourite Pokemon, is fundamentally a relatively simple centipede shape that we thought we could figure out.
This is the first time Adrian’s sewing project is actually Adrian’s sewing project, rather than him designing and me executing the design. I provided some construction advice and helped him pin the design to the fabric, but he has been doing all the real work: designing, measuring, drawing, cutting, and sewing.
I’m done with the 48 napkin hems! And I’ve washed them, and Eric ironed them, and now they’re looking very sharp.
Some of them got discoloured somehow by the ironing – not burnt, but stained with some brown gunk, probably from the ironing board. (You can barely see one of the stains in this photo, along the left edge.) I washed them again and was very, very relieved to see that they were white again.
I put the final touches to the paint on the garden sofa yesterday (or was it the day before?). It feels like new, especially after Eric added a diagonal crosspiece to strengthen its construction. I used to be cautious whenever I handled it. Now I carried it up from the basement on my own (the family is still away) and it didn’t flex or wobble at all.
The sofa is back in its spot on the deck – right on one edge, where it gets shade from the cherry tree in the morning, and from the house the rest of the day. I like reading the morning newspaper there. It’s also a nice spot for sewing.
I’ve cut up the second tablecloth and now I’m hemming all those new napkins. By hand. I’m not entirely sure why I’m doing this by hand. It’s inefficient as heck and it’s going to be taking forever, but somehow it just feels right. Machine hemming vintage linen would simply be wrong.
The first tablecloth yielded 8 napkins with a total of 16 edges to hem, since I got so many edges for free. This one yields 16 napkins with a total of 48 edges. (4 napkins with 2 edges each, 8 with 3 edges and 4 with all 4 edges raw.) That’s a lot of hemming. Good thing I’m on vacation.
It’s summer and the weather is lovely, and do I use this opportunity to do things in the garden? No, I’m on a crafting spree and the garden is borderline neglected. Some other day.
Next up on the list of “someday” projects: semi-fancy cloth napkins. Every Christmas and New Year’s and other festive opportunity when I cook semi-fancy food and we bring out the linen tablecloths, we have napkin problems.
Store-bought linen napkins are nice but feel a tad too stiff – formal rather than festive. They’re often too large, more for show than for use. I find them intimidating.
Plain paper napkins are the opposite – too plain.
Printed paper napkins, which at first glance look like the perfect compromise, suck in reality. They can look good but most are unusable: the surface is so slick that when you try to actually wipe your mouth (or fingers, if the semi-fancy meal includes finger food) then they don’t absorb anything.
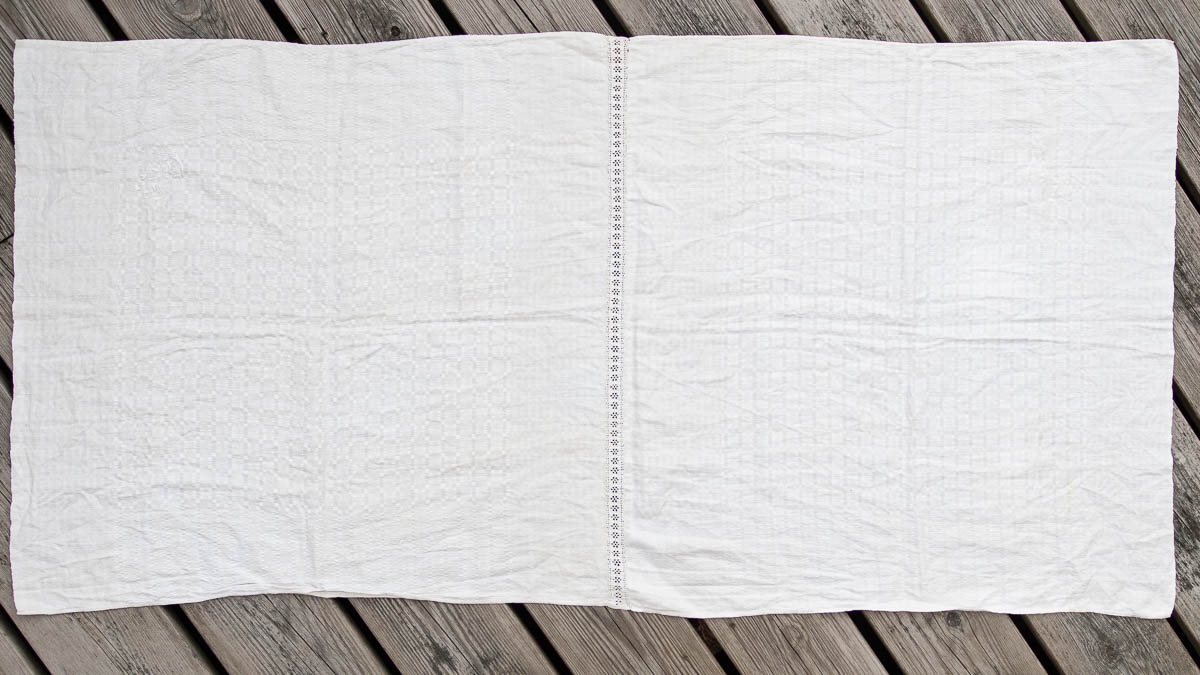
Today I bought two old linen tablecloths from a second-hand store (Stadsmissionen in Bromma). I’m going to cut them into squares and turn them into napkins. They’ll be homey and invitingly soft and conveniently small.
In fact now that I look more closely at one of the tablecloths I bought, I see it’s made of two large napkins with a strip of lace in between. Looks like they’re mismatched – I didn’t see that until I took this photo. And they’re huge! Each one will be turned into four napkins of more sensible size.
This will be the third incarnation for these napkins – from napkin to tablecloth and then to napkin again (but smaller). What shall I call this, then? Re-upcycling? Up-and-down-cycling?
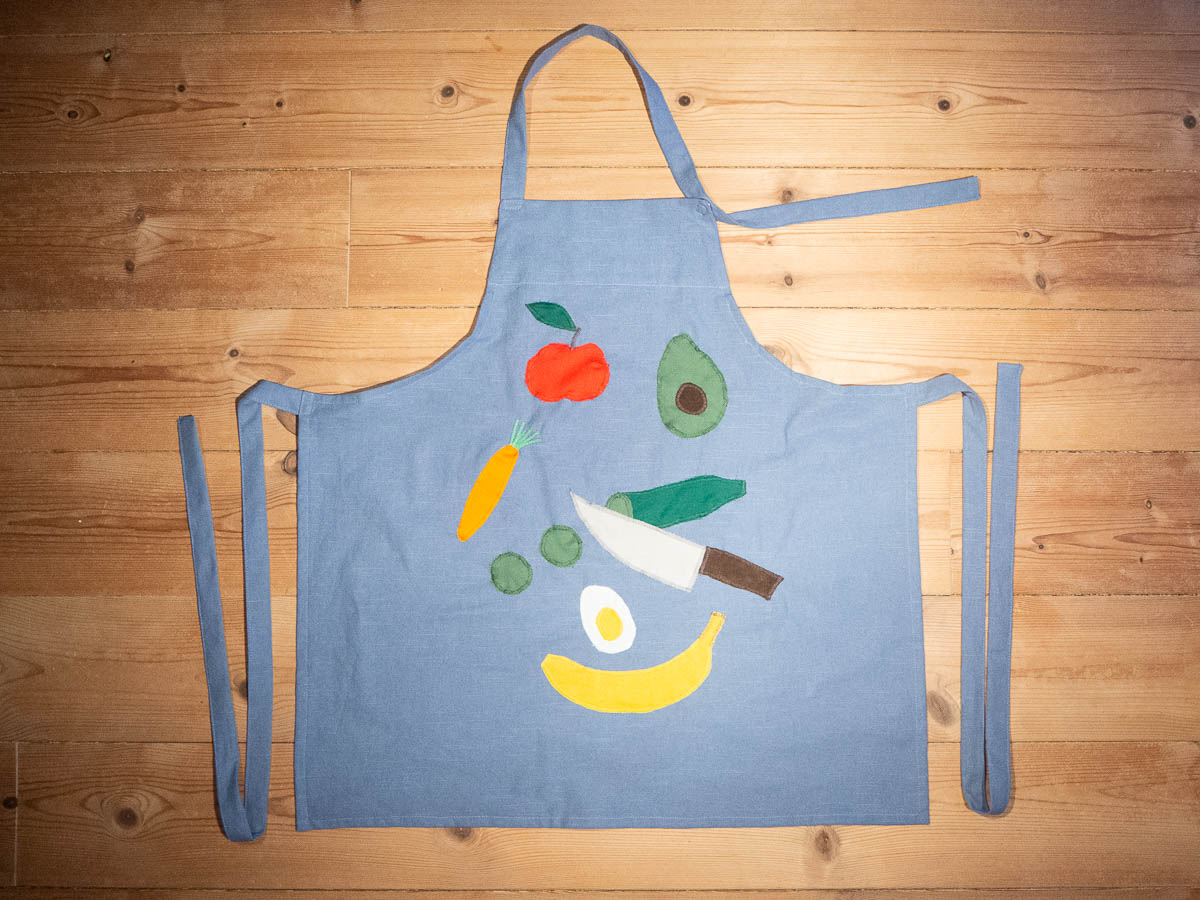
Everyone in this household is now cooking or baking regularly. Alone among us, Adrian had no apron that fit him.
Store-bought aprons aren’t quite one size fits all, but nearly: there are two sizes on the market instead of one. Kids’ aprons are sized for kids aged 4 to 6 or thereabouts, and the ones we had are now way too small for Adrian. Adult-sized ones are still way too large.
What does one do? Make one, of course!
I like easy sewing projects like this. No worrying about fit, just have fun. And it takes no more than a few hours to get done.
Adrian made the design, I made it happen.
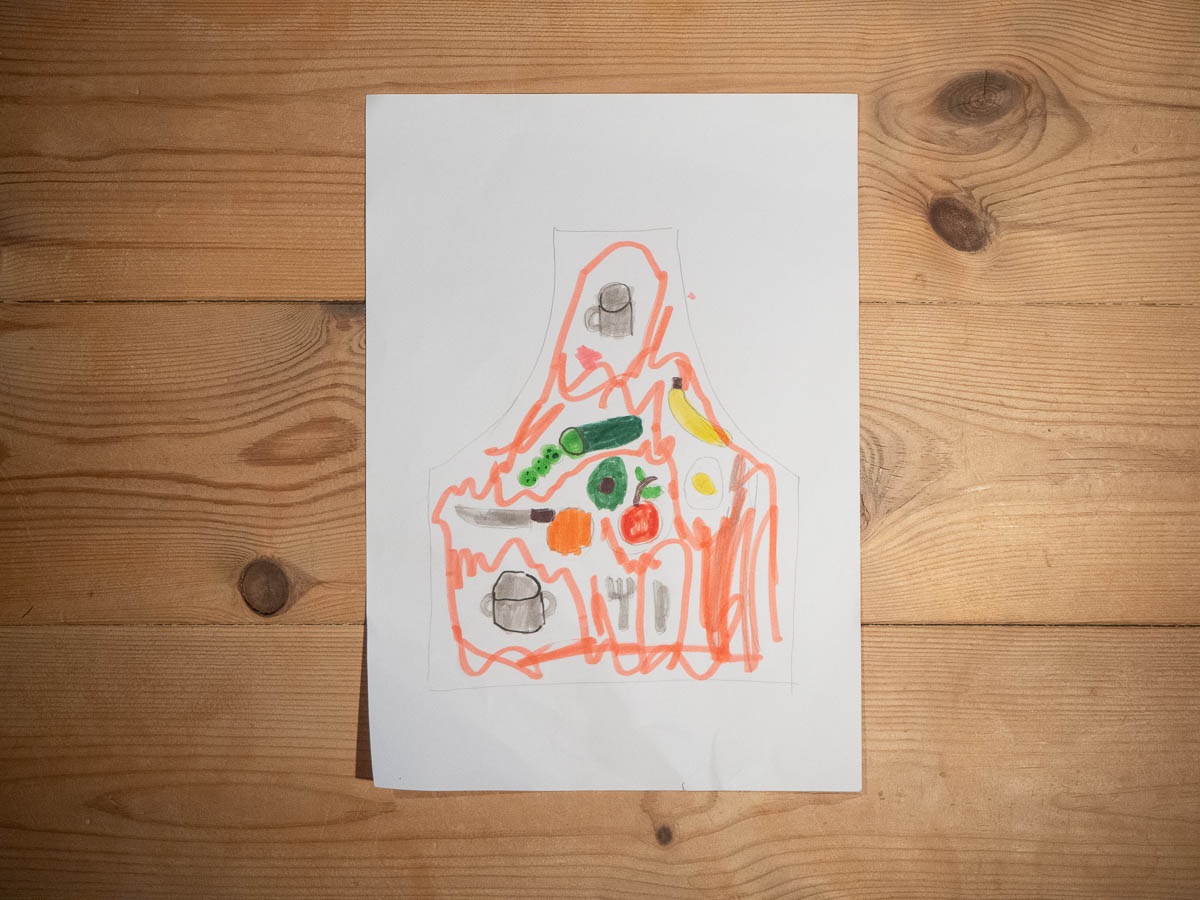
He had a very clear idea of what his apron should look like, with colourful appliques of fruit and vegetables (and an egg) and cooking utensils. Most of them he chose, I think, because they look cool – he doesn’t even really eat avocados – but the cucumber got pride of place because it is his favourite vegetable.
We later replaced the orange with a carrot, because it’s hard to make an orange not look like an orange-coloured ball, and had to skip most of the utensils because we couldn’t fit them into the space we had. We switched from pink to blue because we couldn’t find a sturdy fabric in the kind of dusky pink he had in mind. But the final result is pretty close to the original design.
Functionally, the apron has three tweaks that I wish all my aprons had as well.
One: no pocket. I’ve never used any of the pockets on my aprons – all they do is get in the way and get dirty.
Two: ties of generous length. Both Adrian and I like taking the ties all the way around the waist and tying the knot in the front.
Three: neck strap adjustable using snaps instead of rings. Non-adjustable neck straps suck; I’ve ended up tying ugly hard knots in some to make them fit. And D-rings always end up slipping. Watching Master Chef on TV, I noticed that they had snaps instead. Of course that’s the way to go!
Most of current fashion is so far from my taste that I struggle to find clothes that I want to wear.
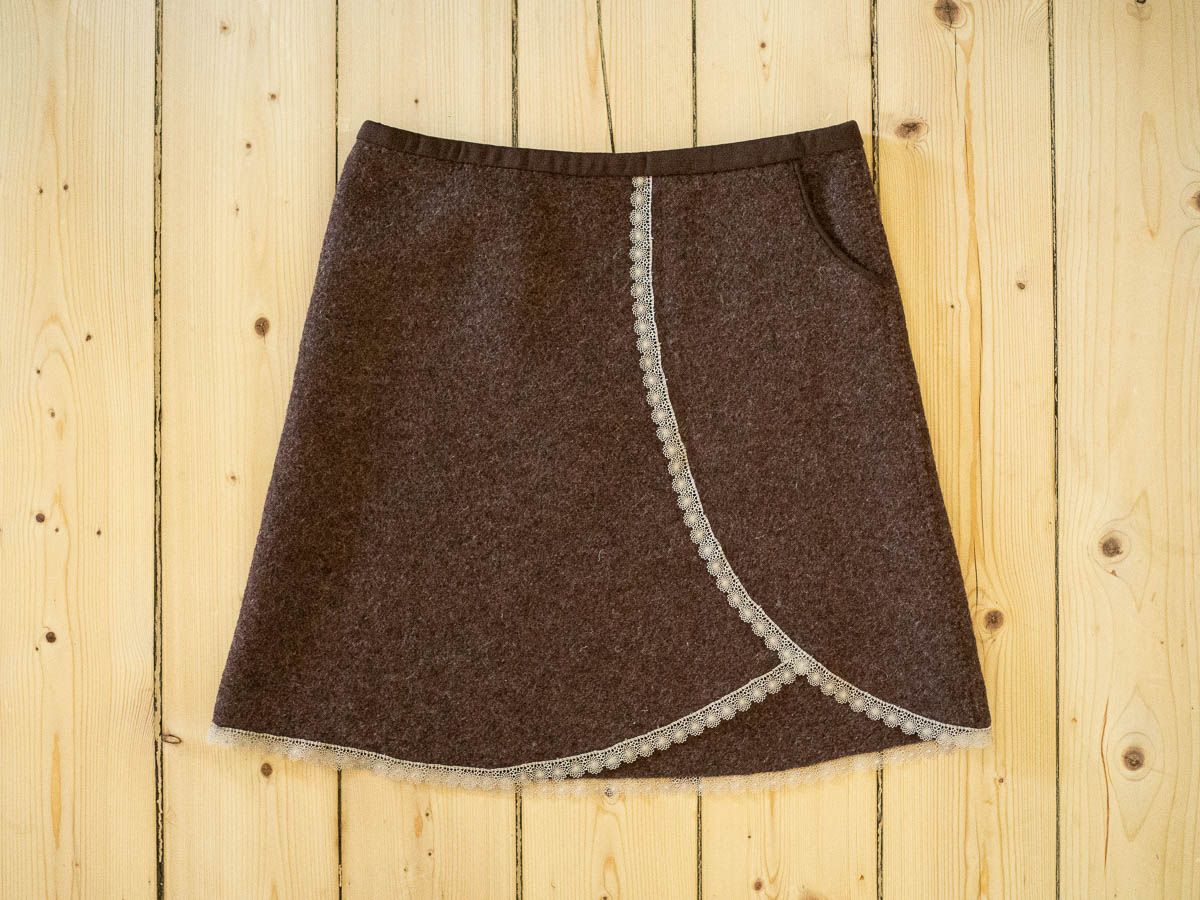
Take skirts, for example. I like A-line skirts that reach at least the top of my knees. Straight, narrow skirts I cannot walk in; short skirts I cannot sit in. I rather like being able to do both, freely and without worrying about my clothes.
I’m generally cold, so for winter wear I prefer wool.
And I want my clothes to look at least somewhat interesting. Not for the sake of whoever may see me in those clothes, but for my own sake. Plain flat cloth in a single colour (or even worse, a non-colour like black or navy or beige) is simply depressing. I want interesting fabrics, or panels of different fabrics, or drapes and folds, or lace or embroidery or appliques, or funky pockets. Anything!
There are probably places that sell these kinds of skirts, somewhere – but not the high street stores or the major online retailers. All the skirts in my winter wardrobe (with one exception) I bought before we moved back from England. That makes them over 10 years old, and some are definitely at the ends of their lives.
During this Christmas break I gathered my courage and sewed a skirt. Yay!
I have very little experience at sewing clothes. The actual stitching part is easy. The hard part is making it fit. I can sew sofa cushions and dress-up costumes or plush toys without much of an effort: I just put some pieces together and voilà, here’s a cushion! But a skirt needs to actually fit. Ready-made patterns usually don’t fit me well out of the box, so there would be measuring and adjusting the pattern and more measuring and then more of the same, and what if it ends up not fitting after all?
But I figured that I could manage a simple A-line skirt, especially if I chose a forgiving, slightly stretchy fabric. My new skirt is made of nice, warm, thick wool in a nice non-black colour. It has an asymmetrical hemline, and both lace AND a funky pocket! And it fits. (Phew!)
I hand-stitched the side seams, because the fabric was so thick that this was easier than trying to get three layers of it through the sewing machine. Once I’d done that, it felt wrong to machine sew the next part, so I just kept going by hand. It looks really nice this way – the seams are nearly invisible – but that’s a side benefit. I simply enjoyed the stitching.
| « Older posts | Newer posts » |