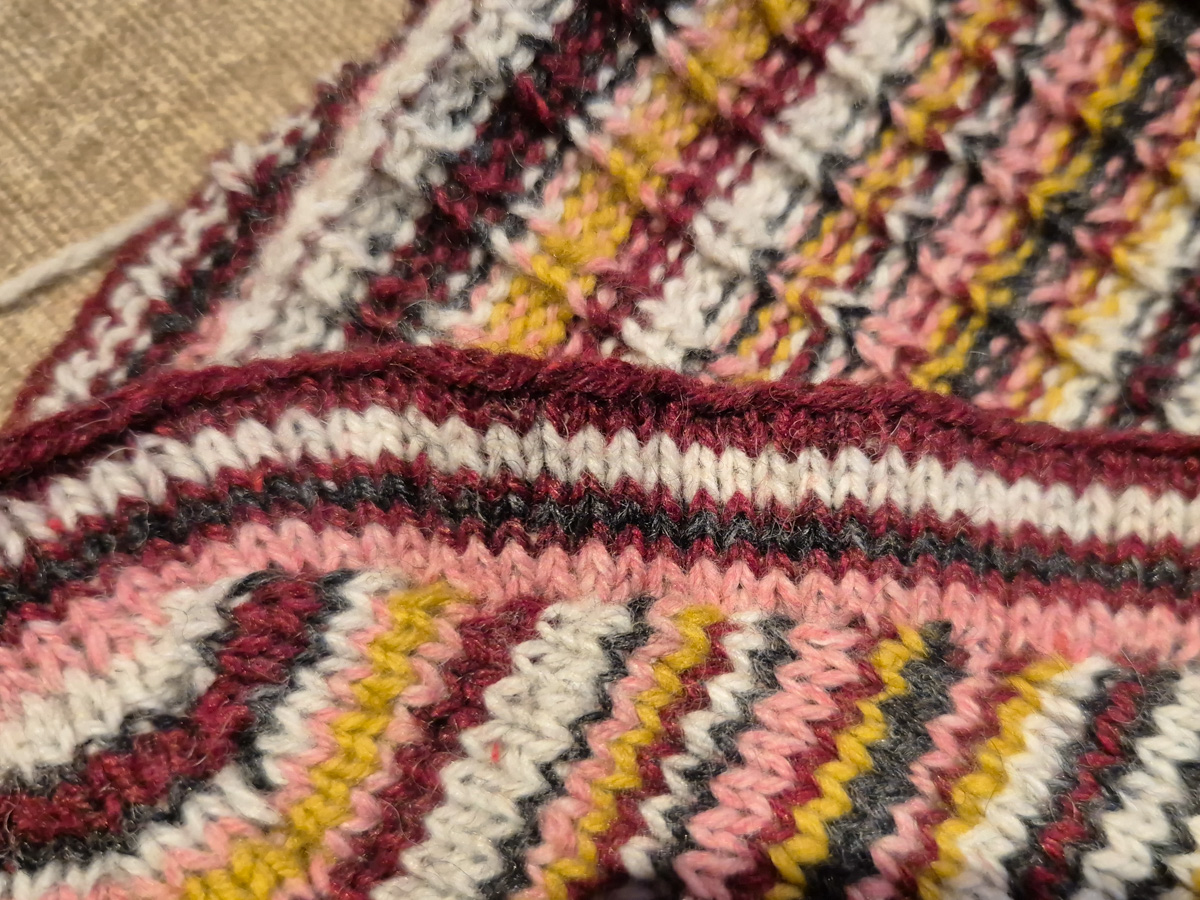
Just the neckline left on this striped sweater. I knit it once already, but it turned out too loose, so now I’ll be unpicking it and making a new attempt.
Just the neckline left on this striped sweater. I knit it once already, but it turned out too loose, so now I’ll be unpicking it and making a new attempt.
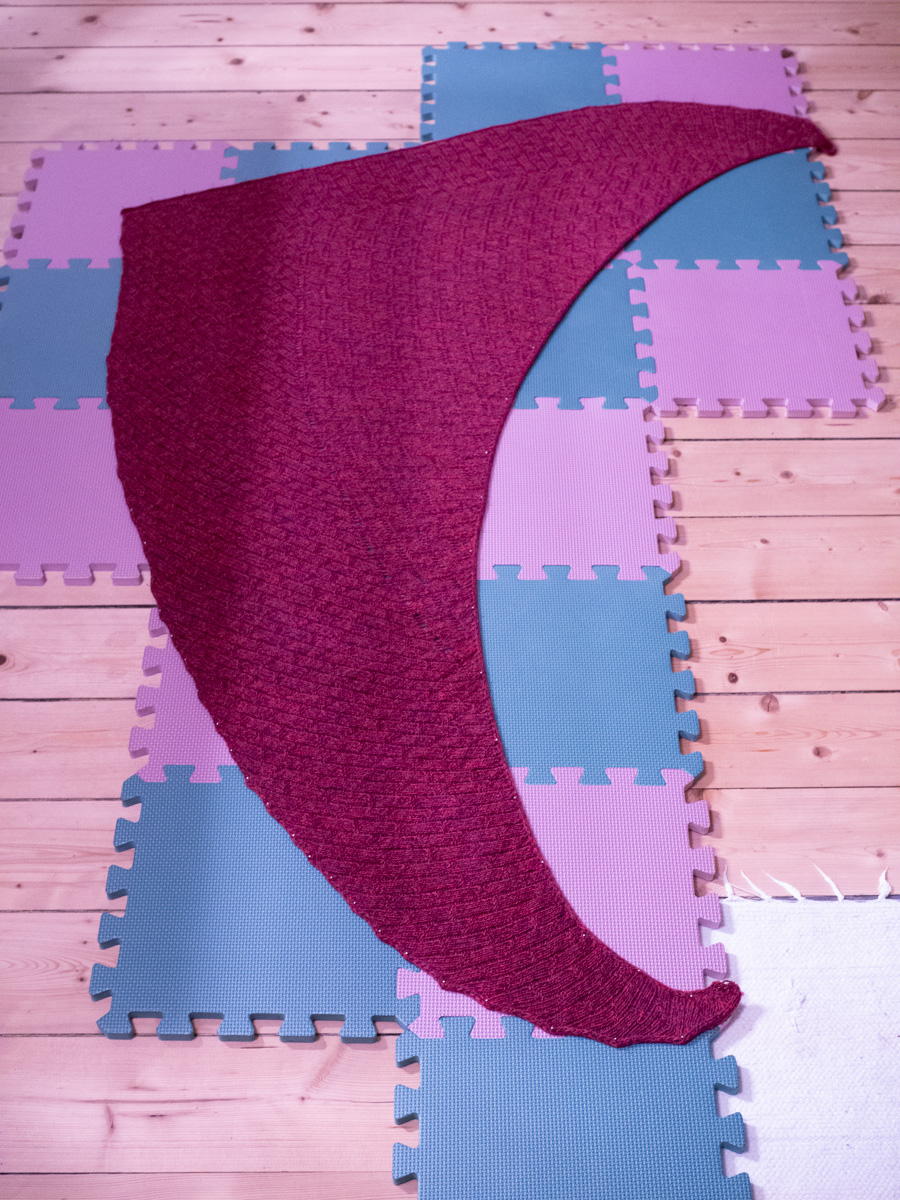
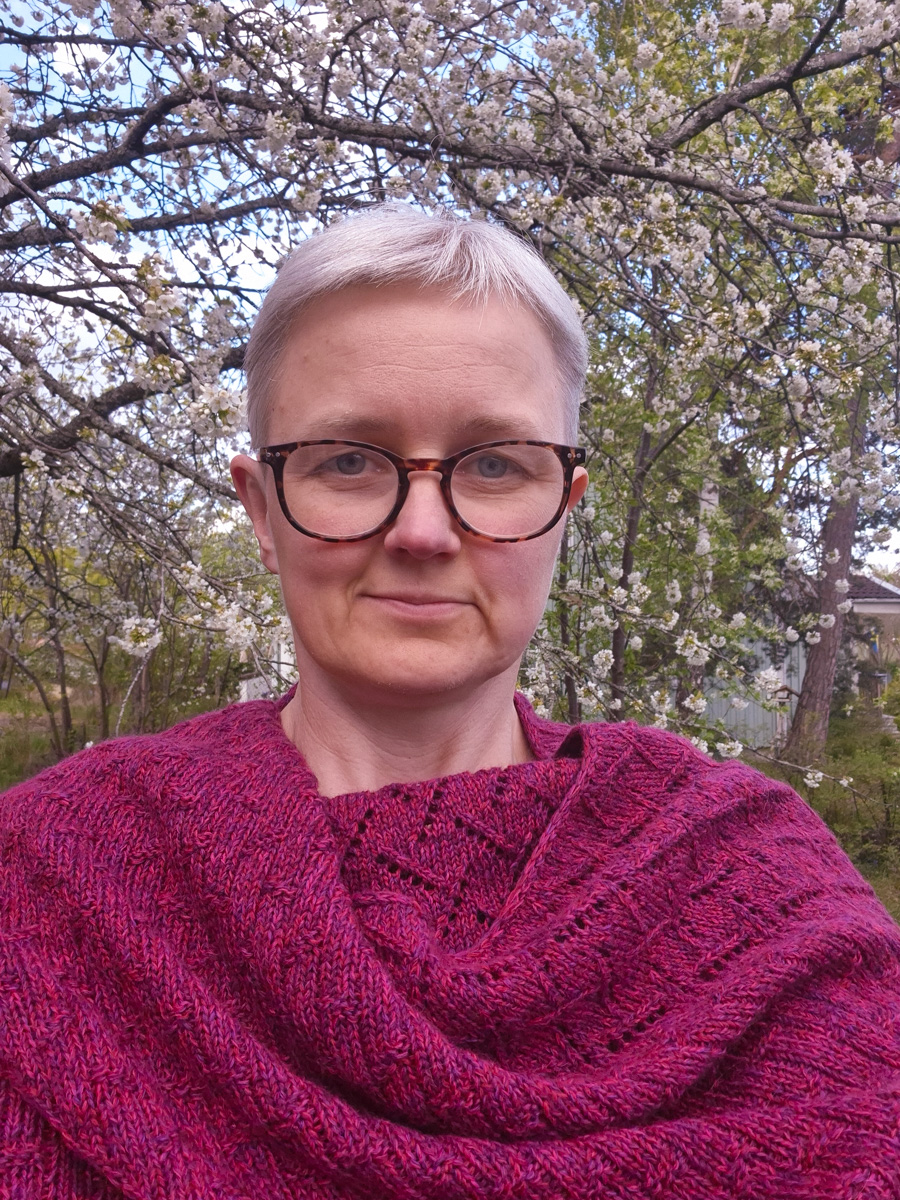
I finished the purple shawl yesterday and blocked it overnight. All done now.
Pattern: De nada. Yarn: a random find from Tradera.

There’s a lacy section and a section with a kind of broken ribbing.
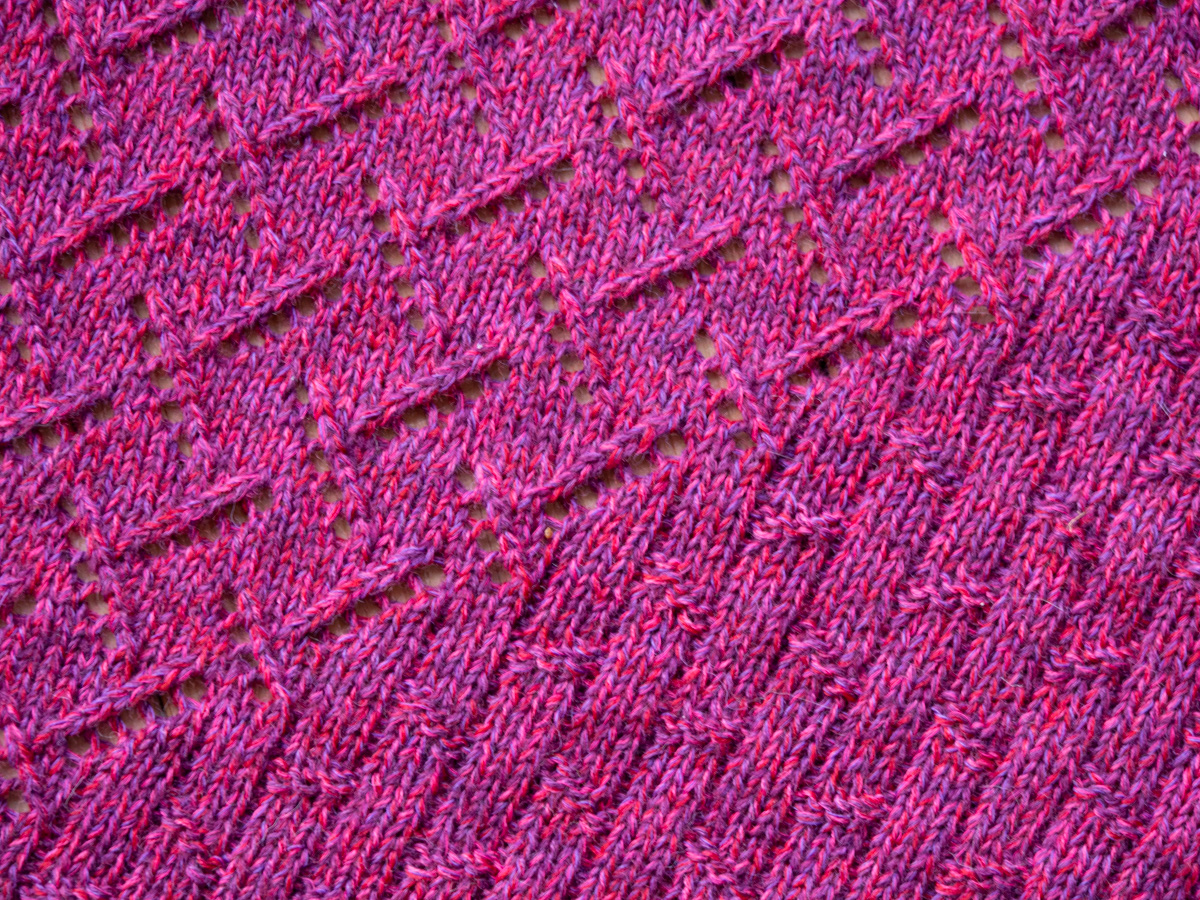
The lacy section is more striking, but the ribbing has its place. Without it, the whole thing would look more boring.
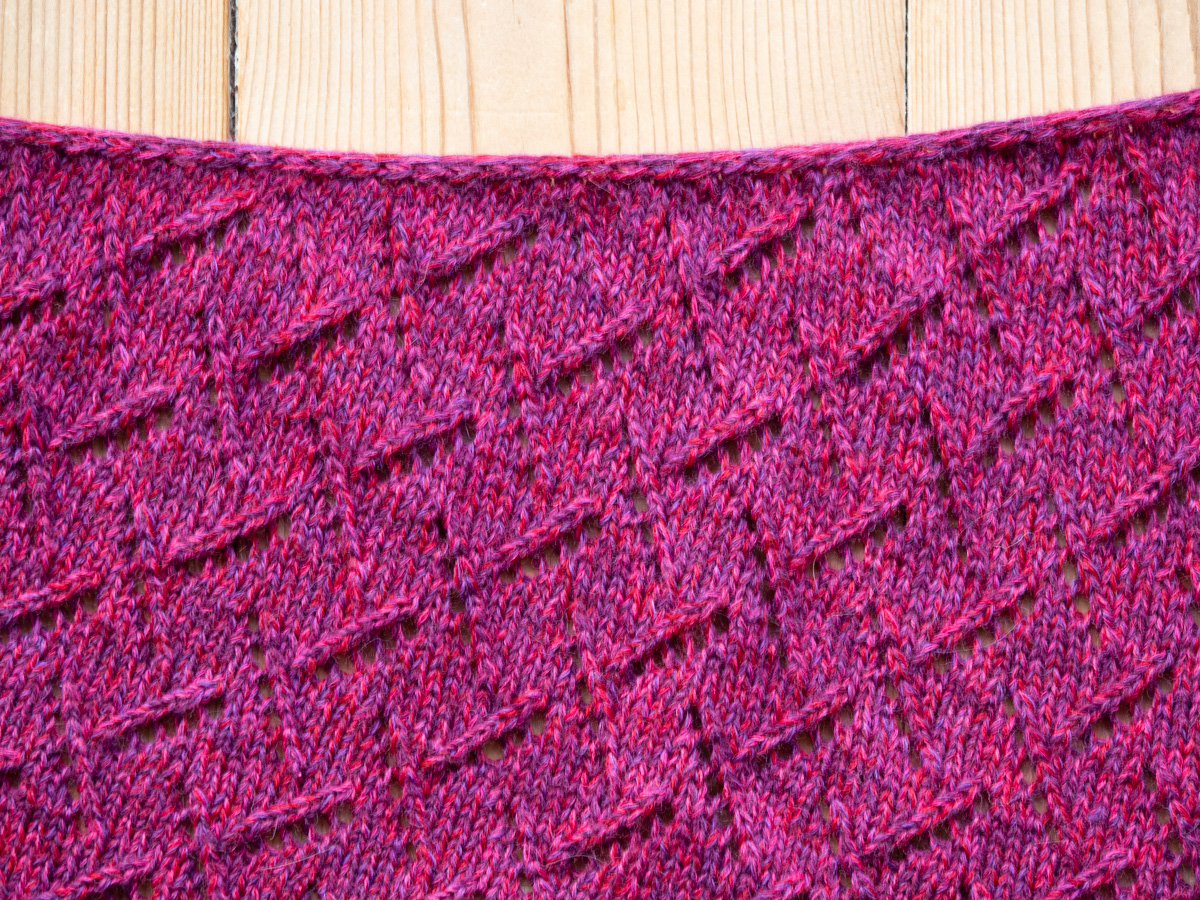
The pattern photos showed the shawl blocked into a triangle shape, but mine would not stretch into a triangle even if I tried. I did block and pin it more forcefully than I usually do, because it was so shapeless otherwise, but there is no way that edge can be straightened.
The curve is a good thing. A straight-edged triangle might look better when the shawl is lying flat, but a curved shawl fits much better over my shoulders. If it was a triangle, there would be a lot more bunching at the neck.
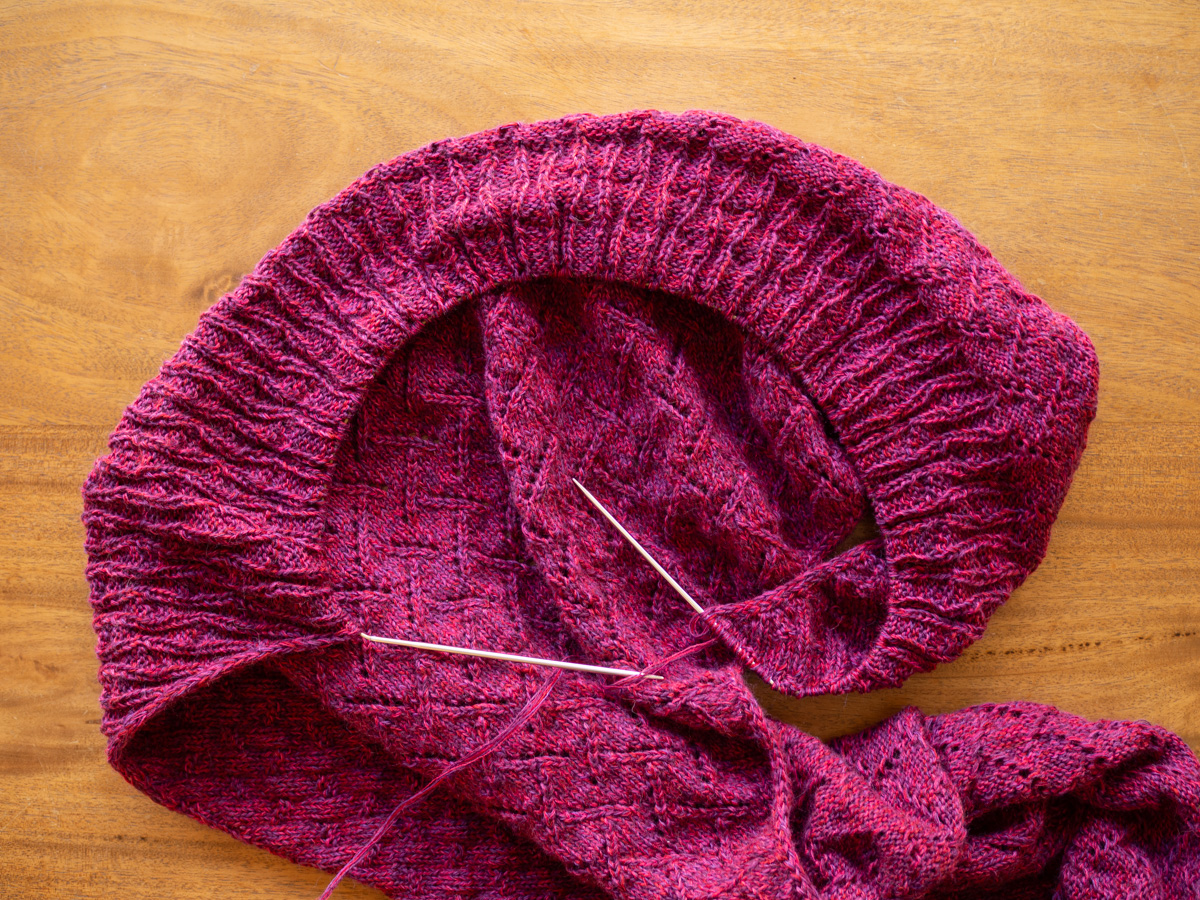
This shawl is coming out very nice, and I’m rather ready to be done with it. It’s a triangular construction that starts at one corner and ends at the opposite edge. Initially it feels like it knits up so fast, but then the rows get longer and longer, and it really feels like the progress stalls towards the end.
I’m so used to being able to combine knitting with another activity – maybe watch a knitting podcast on Youtube – but with this yarn it’s not so easy, I need to actually look at what I’m doing. At the same time the pattern doesn’t require much concentration. It’s rather perfect for knitting club, actually, where I can look at the knitting but still talk and listen to other people at the same time.
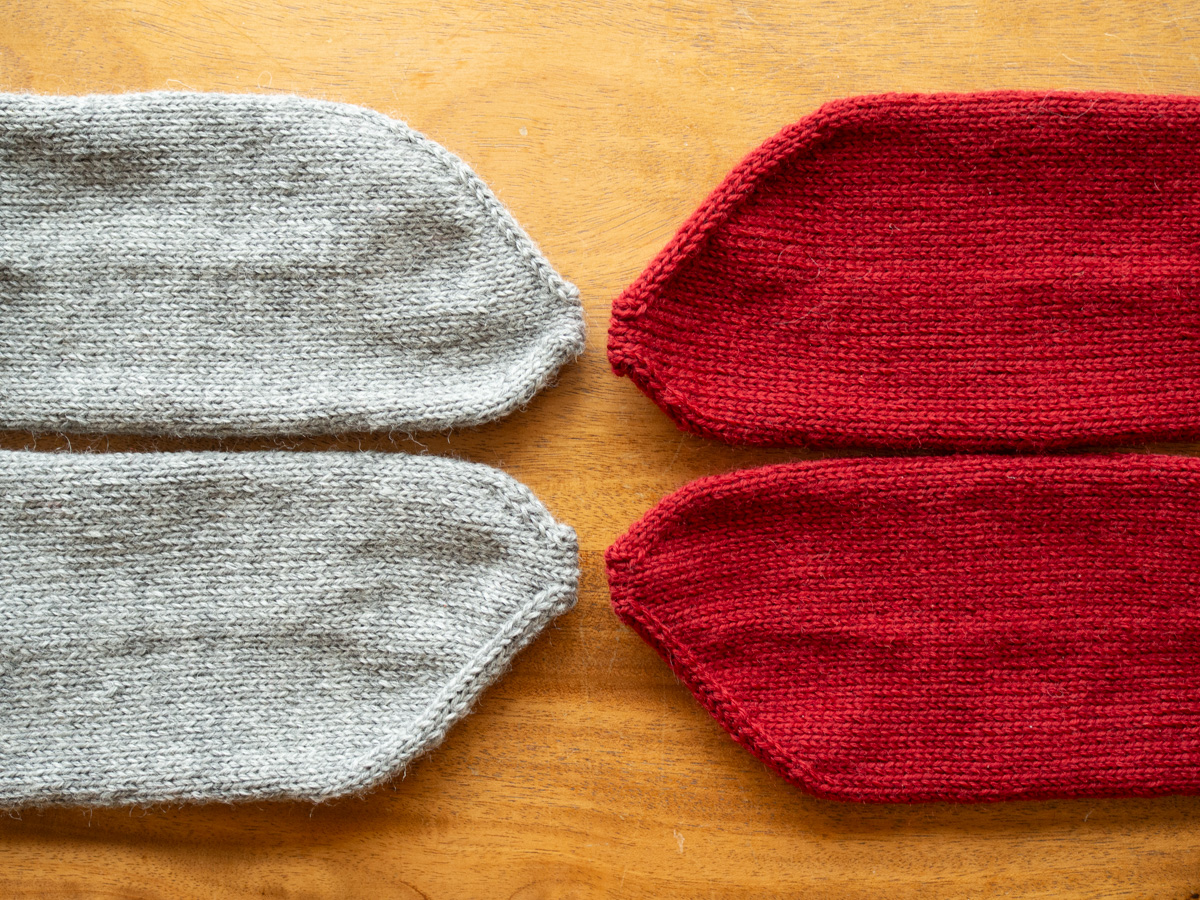
Two pairs of gift socks all done and ready to be given away.
I briefly considered making standard toes on these (maybe they will think these look weird) but there is just no world where a symmetrical sock toe will fit someone’s feet better than a more foot-shaped one. Even if their toes are at a different angle or their second toe is longer than their big toe, or whatever odd shape they may have, I am absolutely certain that they will be closer to this than to an equilateral triangle.
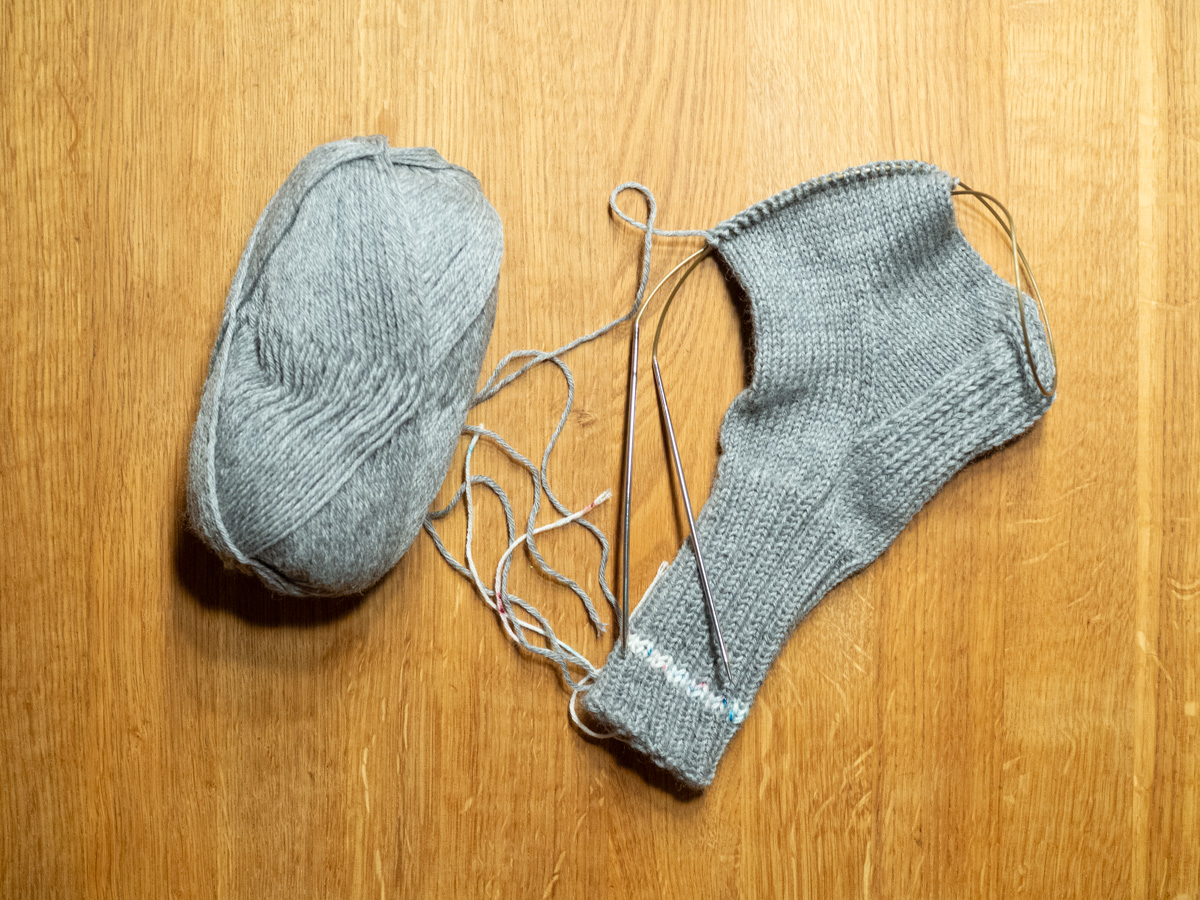
Third attempt. The second one came out too small. I’m not entirely sure about this one either. Should I make them looser? Well-fitting socks need to be tight but not too tight.
It’s a good thing that socks are small; I have time for a fourth attempt if needed. Maybe I’ll put this one to the side and start a slightly larger version in parallel and then see which one I believe more in.
There are two birthdays coming up in April, for people who deserve hand-knitted socks.
I’ve knit so many everyday socks for myself that it takes no effort. Knitting socks for someone else – whose foot I don’t have access to, for trying them on for size – is a whole other matter. I’m also using a thicker yarn than usual, so the numbers I’ve learned by heart don’t work at all.
This is my second attempt of the first sock. The label on the yarn suggested using 3 mm needles. The fabric came out way too drapey and floppy with those. Could have worked for a cardigan or something, I guess, but it was absolutely not right for socks. This is a sock yarn, both by fibre content and by name. Why would they suggest a needle size that won’t work for knitting actual socks? Argh.
The worst of it was that I discovered this at the knitting meet-up. And, trusting the label, had only brought my 3 mm needles. Luckily another knitter had extra 2.5 mm needles that they could lend me for the evening. I brought the sock home with the stitches on a piece of scrap yarn.
I unravelled the bottom half of the first sleeve and re-did it with decreases. Now I’m on the second sleeve, and I made good progress during today’s knitting club session. Plus I’ve found a good method to pack it in a project bag so that I can work on it without taking it – and its five balls of yarn – out of the bag at all, so I can bring it with me to work etc.
I’m enjoying knitting this, but I’m still not sure if I’ll actually like wearing it. Maybe? Hopefully?
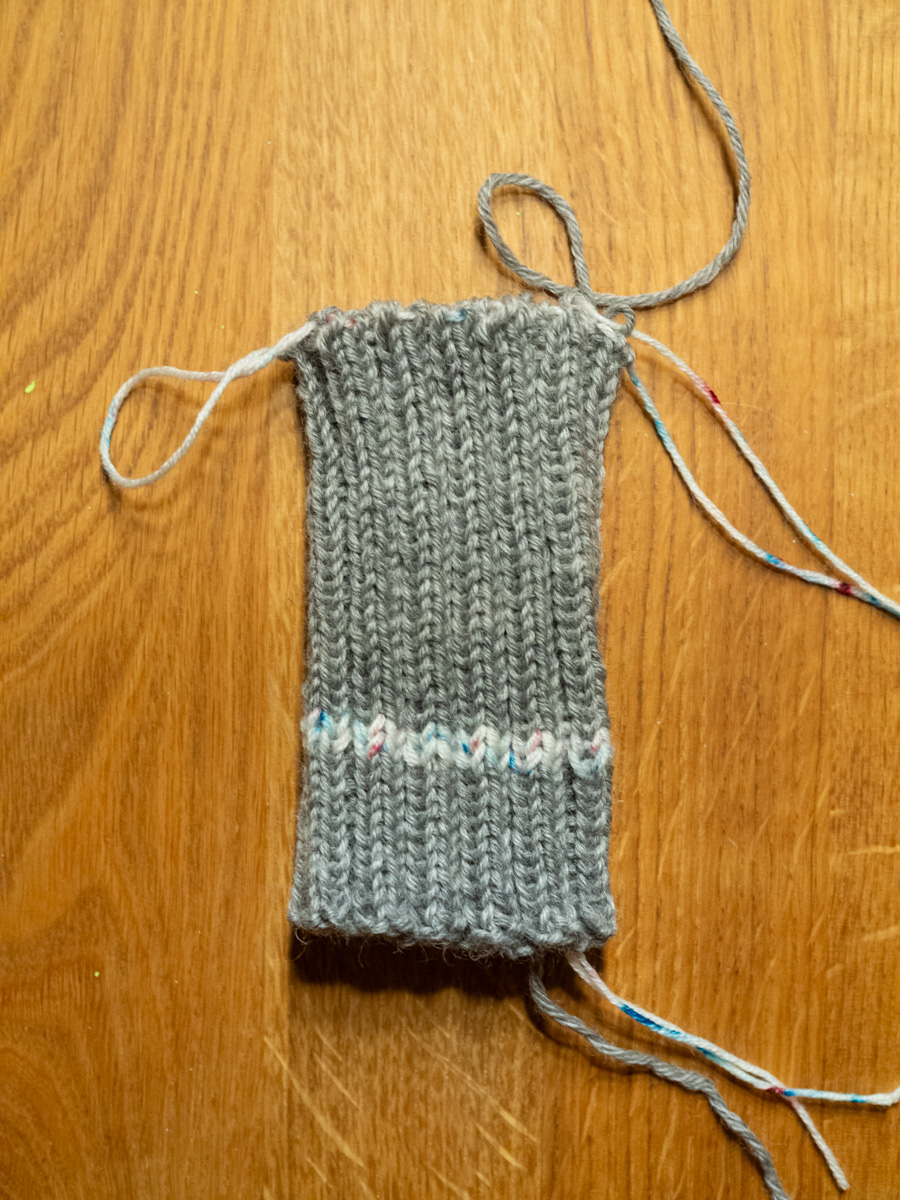
The striped sweater has been in timeout for a month or so. I knitted the sleeve straight because I didn’t want to deal with stripes and ribbing and decreases at the same time, and I hoped that the ribbing would make it stretchy enough to fit well even without shaping. At about halfway down the forearm, it was becoming clear that that wasn’t going to work out. I was pretty sure I’d have to rip the sleeve back past the elbow and redo it with shaping, but I really wasn’t looking forward to that.
For today’s knitting club meet-up, I packed the sweater and no other project, so I’d have no choice but to bite the bullet. Ripping back the stripes was exactly as finicky and slow as I had expected it to be. So much yarn management: rip back one row at a time, wind it up, carefully shuffle the balls around to keep them from tangling. But with company around me, it wasn’t as tedious as it would have been otherwise. I got it all done and actually got as far as knitting a few rows at the end. (With decreases!)
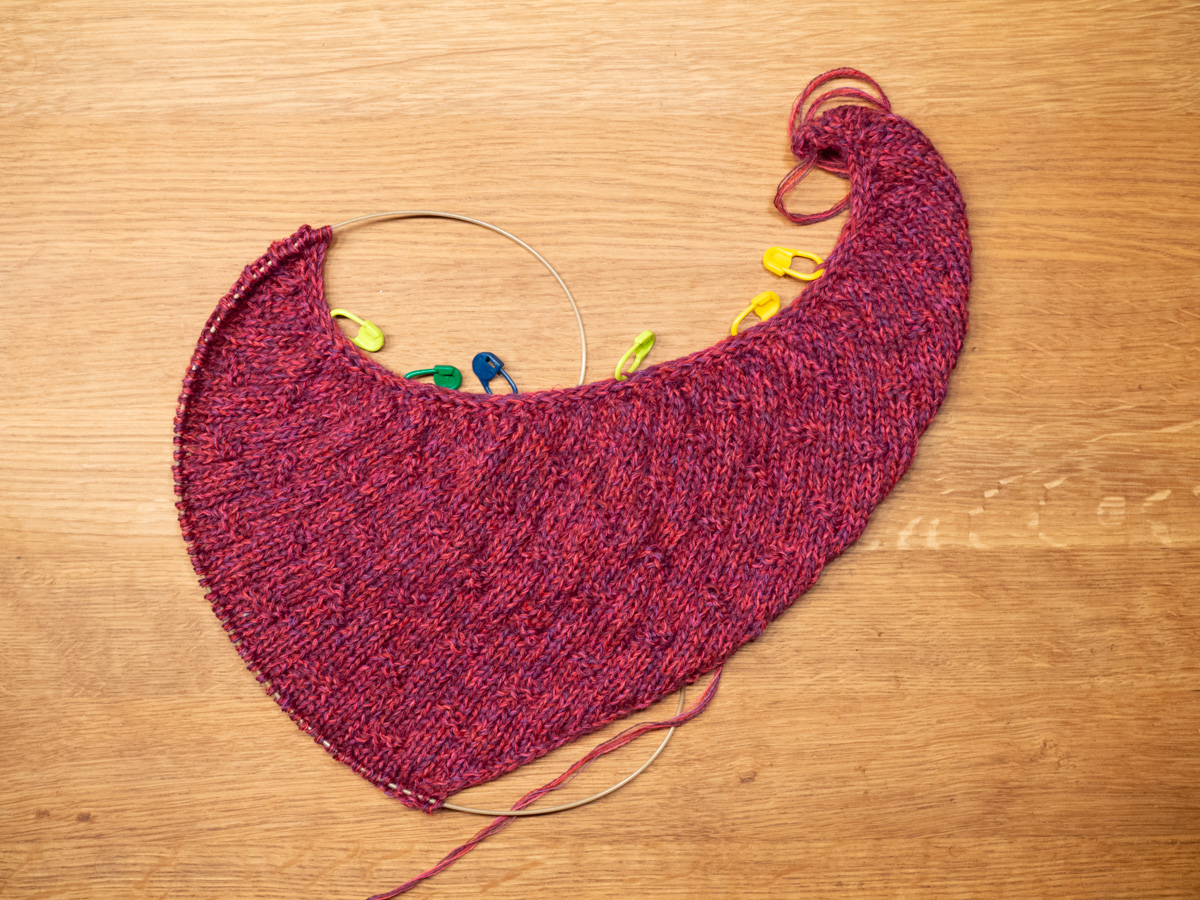
Knitting club Wednesday. I didn’t want to bring a sock – sock knitting is for commutes and meetings and flights – and the striped sweater is in time-out because I don’t feel like it, so I started a shawl.
The yarn I bought online some time ago. Maybe the colour wasn’t exactly like I imagined from the photos, but it’s still quite pretty (better in daylight than in this late-night lamplight) and feels very, very nice. Some combination of merino wool, silk and cashmere, according to the description. It’s an unplied yarn, if it can even be called “a yarn”: it’s an unplied bundle of eight very, very thin threads, thinner even than sewing thread. Some are red and some are purple, and they’re probably all made of different fibres. It’s tricky to knit with, easy to miss some of the threads with the needle – definitely not something I could knit without looking at what I’m doing.
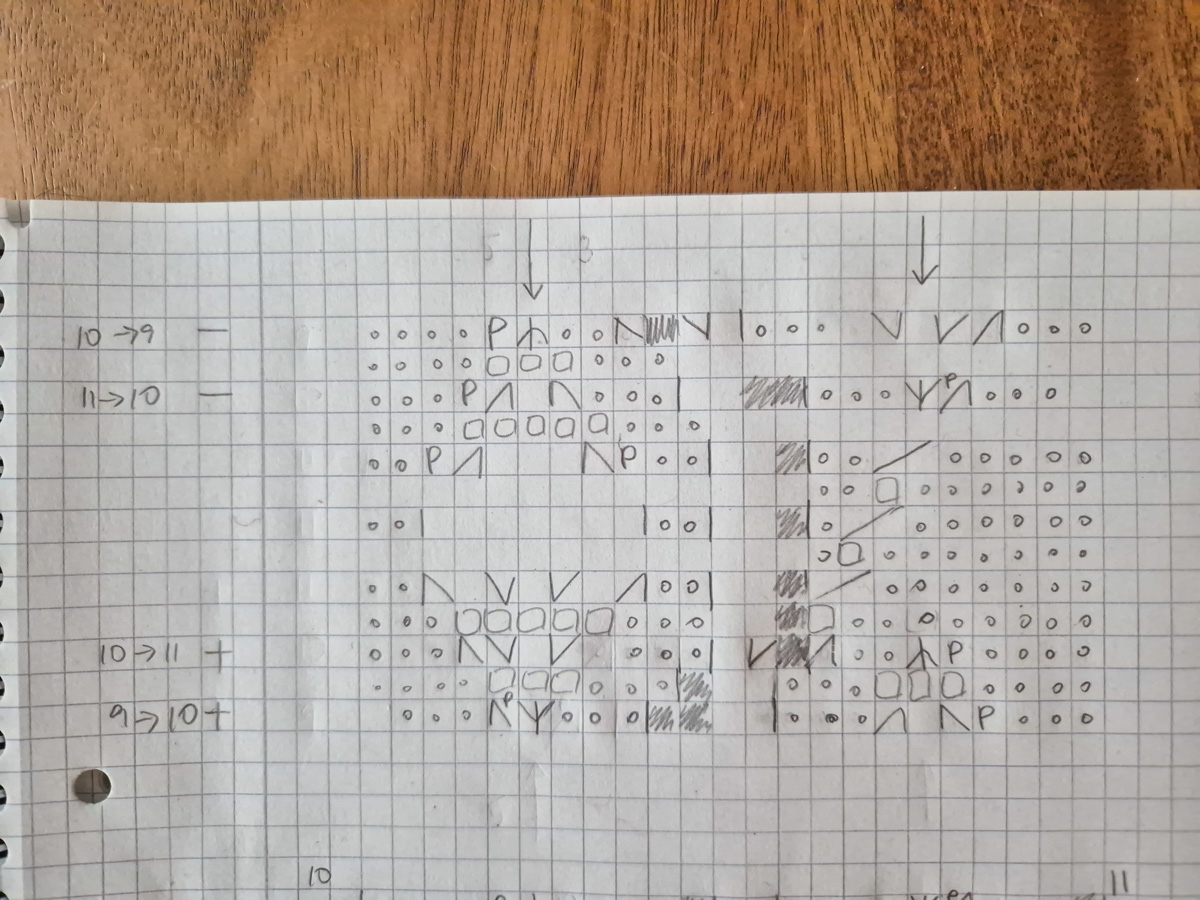
Clean-ish complete-ish chart of the leaf pattern. Only because I didn’t take any other photos today. Not because I expect anyone to be interested, or this to even be understandable to anyone – I had to make up my own symbols for “purl two together through the back loop” and fuzzy concepts such as “make one purlwise, leaning in the direction that fits the situation”, and I didn’t bother to note down the obvious middle bits.
| « Older posts |