I was raised a perfectionist. If I didn’t have perfect grades, I sensed mild, baffled disappointment – “What happened? Surely you can do better?” That expectation rooted itself in me and I came to see it as natural, and as my own. So for years I’ve tried to do things as well as I possibly can.

“If it’s worth doing, it’s worth doing well.” When I’ve known that I don’t have the time or skill to do something well, I have chosen to not do it.

Now I am finally trying to unlearn that perfectionism and to practice “good enough” instead. “Don’t let perfect be the enemy of good.”

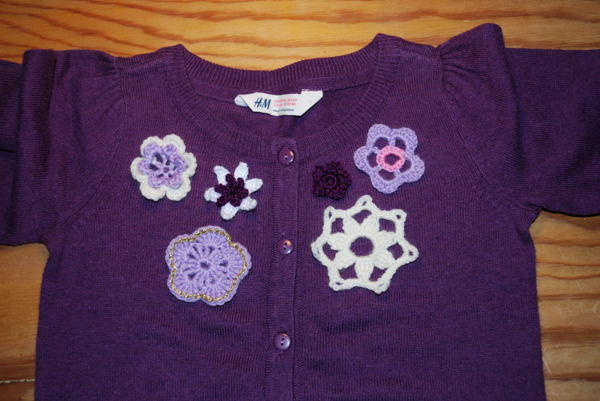
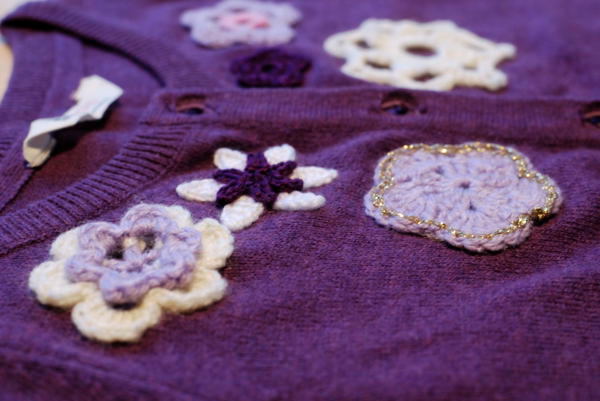
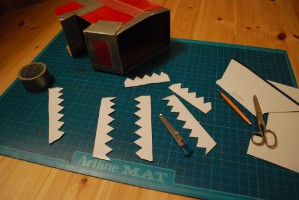
See that chair makeover in the previous post? The seats of our kitchen chairs were worn out and stained and needed replacing. Reupholstering a seat is not much work: from beginning to end, it took me about an hour per seat. But there are also the backrests. Reupholstering those would require the chair to be disassembled almost completely, and then the actual reupholstering would be a lot fiddlier. I don’t even know exactly how the fabric is attached, but it would almost certainly require more than scissors and a staple gun, probably quite a lot of measuring and sewing. Given all the other tasks and projects on my list, it was clear to me that that just wasn’t going to happen. I could of course also have bought new chairs, or accepted them in their somewhat ugly state. But I opted for a good-enough solution, and reupholstered just the part that actually needed it. So what if the seat fabric now doesn’t match the backrest.

Likewise in the garden. For some time now (like, a couple of years) I’ve wanted to do something with the one and only flowerbed in our garden. To do it properly, we should replace the stones around it, because the lawn is creeping into the flowerbed. And we should probably move them a bit further out because the flowerbed is quite narrow. And we should really mix manure or compost into the soil, which is dry and poor. But… all that would take me an entire weekend, and that’s just not going to happen any time soon. So instead of waiting for that utopian weekend (with no kids to interrupt my work, and decent weather, and nothing more urgent to do) I just bought and planted a bunch of perennials that should hopefully be able to cope with the poor soil, in the narrow space that is there, and then threw in some cheap annuals to get some colour straight away. It’s not perfect, but it’s something, which is way better than nothing.

Our kitchen chairs have a new look.

When I was browsing cardigan patterns for myself, Ingrid saw some photos of cardies with flowers around the neckline and asked if I could make one of those for her. Economizing, I bought a simple cardigan from H&M and just made the flowers myself.


We only decorated a handful of eggs this year. Some we dyed with onion skins, others we painted with watercolours.

The black-and-white one at the front Ingrid made especially for her judo teacher Erik: it is, of course, Erik in his white judo suit and black belt. The idea was his and not ours but it is a fun egg nevertheless.

I’m knitting again. This time I’ve chosen an ambitious project: a lovely lacy cardigan.

I like knitting, and I’ve knitted a number of projects over the years, but most have been slightly “off”, one way or the other. Years ago I knitted an entire sweater that, when I’d finished it, just didn’t suit me – it wasn’t the right pattern for me. I still have it because I haven’t had the heart to throw it out, but I never wear it. The hat I made for Ingrid last year was too thin and floppy – not the right yarn. She rarely wears it. A hat I tried to knit for Adrian last winter came out too small; he never wore it.

I’m hoping this one will be different and will come out the way I picture it.

Among the dozens of blogs I read, there are several crafts blogs. One recurring theme across those blogs is using doilies for crafts. There have been posts about doily garlands and doily collages and doily reverse applique t-shirts and doily-decorated flower pots and so on.

Doilies are, of course, an essential ingredient for these projects. This whole category of crafts hinges on easy access to cheap doilies. Most instructions begin with something like “pick up doilies at thrift shops for a few dollars”. You wouldn’t make doily garlands (which involve cutting those doilies in half) if you first had to crochet the doilies yourself, spending several evenings on each one.

Once upon a time doilies were something that people lovingly made by hand and decorated their homes with. There were instruction books and patterns and kits. At some point they lost their appeal. And now they’re worth so little in their original role that they get a second life. It is sort of sad to see them (technically) destroyed, but it is also nice that they find new uses. And it is cool that there are so many abandoned doilies out there that they give rise to an entire genre of crafts, and that despite being lacy and sheer, they are durable enough to outlive their fashionability by decades.

Full disclosure: we had doilies in our home when I was a kid. Both my mum and my grandmother used to make them, and I crocheted a few of my own. All these doily projects make me want to crochet new ones.

Blogging has been lighter than usual recently because I have been busy working on an advent calendar. I finished it in the nick of time, half an hour before midnight yesterday.


Advent calendars / Christmas calendars are very common in Sweden and there are all kinds. In stores you can buy cardboard calendars with a Christmas-themed picture behind each flap, or chocolate-filled ones. There are also advent calendars on TV as well as radio, basically Christmas-themed series with one episode aired every day from December 1st to 24th. There are also tie-in cardboard calendars for those, where the picture behind the day’s flap ties in with the current episode. On top of that, many families with kids have calendars with small gifts.

I was thinking of making an advent calendar already last year but with Adrian’s birth there was no time. I’d even browsed for inspiration and decided roughly on the kind of calendar to make: with pockets, in wool felt, with appliqued and/or embroidered Christmas motifs on each pocket – something like this one on Etsy, but with a starker, more pared-down look like this one on Purl Bee. This year I was determined to make one.

It took quite a bit longer than I’d planned because of unexpected complications. Firstly, I had planned to glue on most of the decorations, and did so with the first few decorations. Then I decided to be efficient do all the cutting and embroidering first, and save the glueing until the end. But when I went back to those first pockets, their decorations were falling off, even though I’d chosen a fabric glue that was supposed to work on wool felt! So instead of glueing I decided I’d stitch the pictures onto the pockets. Which actually turned out very good: the stitching gave each motif just a bit of depth, so it doesn’t look as flat as it would do with glueing.

But now there was so much stitching on each pocket (not only the appliques but the numbers as well) and especially with many long stitches on the back of each pocket, that I had to iron on interfacing to each pocket to protect the stitches. Otherwise they’d get damaged as soon as we put stuff in the pockets. That in turn meant that I had to edge the top of each pocket with blanket stitch, to make sure the interfacing doesn’t come loose from the felt of the pocket itself. More extra stitching!

Now, time to assemble the whole thing, and sew the pockets to the sheet of felt. I had vaguely imagined that I’d do this by machine, just like the Purl Bee calendar. But now that everything else was hand-stitched, machine sewing would look out of place and drag down the overall impression. Besides, when I took out the sheet of felt, I realized it was so thick and stiff that there was no way it would fit under my sewing machine. Yet more stitching!

All the steps up to this one had been fun and challenging in a good way. But this last bit was quite tedious and physically hard work – the background was 3mm dense wool felt and the pockets 1mm, so just pushing the needle through was difficult. And the pockets kept skewing and slipping, so I had to keep measuring and aligning them all the time. (Even so, they ended up a bit wonky here and there.) Halfway through my fingertips were really sore and I thought I’d get blisters. But I counted the days until the end of the month and decided to work a bit slower, leaving myself a narrower margin but sparing my fingers, so I ended up with slight calluses instead of blisters. Much better. Plus, about halfway through I also worked out a better method for aligning the pockets, so there was less fiddling with rulers and stuff, and the work progressed better.

I’m really pleased with the end result. So was Ingrid.

The materials I used were 3mm white wool felt from Handmade Presents, wool felt sheets in various colours from Myriad Online, and small bits of mixed fibre craft felt from my stash (for the faces of St. Lucia and Santa Claus – I was too stingy to order a full sheet when I only needed a few tiny pieces), and DMC 6-strand embroidery yarn.

I chose mostly secular imagery. Christmas for me is more of a midwinter celebration than a religious holiday. The actual designs I mostly drew with inspiration from Google Images… I’m not much of an artist so I went for a stylized, simple look. It’s mostly applique with a little bit of decorative stitching, but some pockets have embroidery only.

PS: Bonus points if you recognize the song on pocket #11!

A suitable box

Apply craft knife, scissors and lots of duck tape

Plus pointy teeth

Finally spray-on paint, eyes and tongue

Ingrid needed a dinosaur costume.

The costume was so effective that it scared poor Adrian witless. When Ingrid and her friends turned up at our door, he screamed in utter terror.

Ingrid needed a scarf.

Pattern: Moss Stitch Loop Scarf. Yarn: Drops Delight.