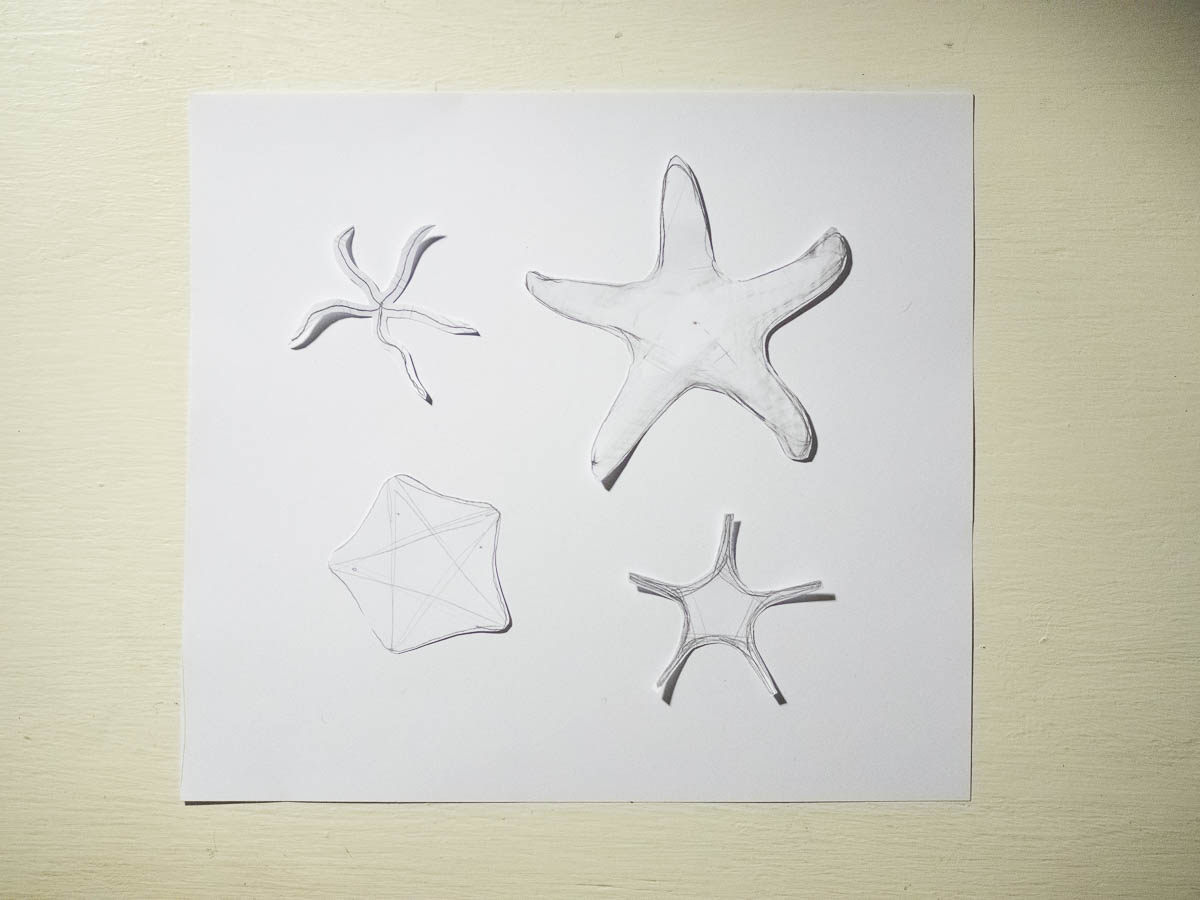
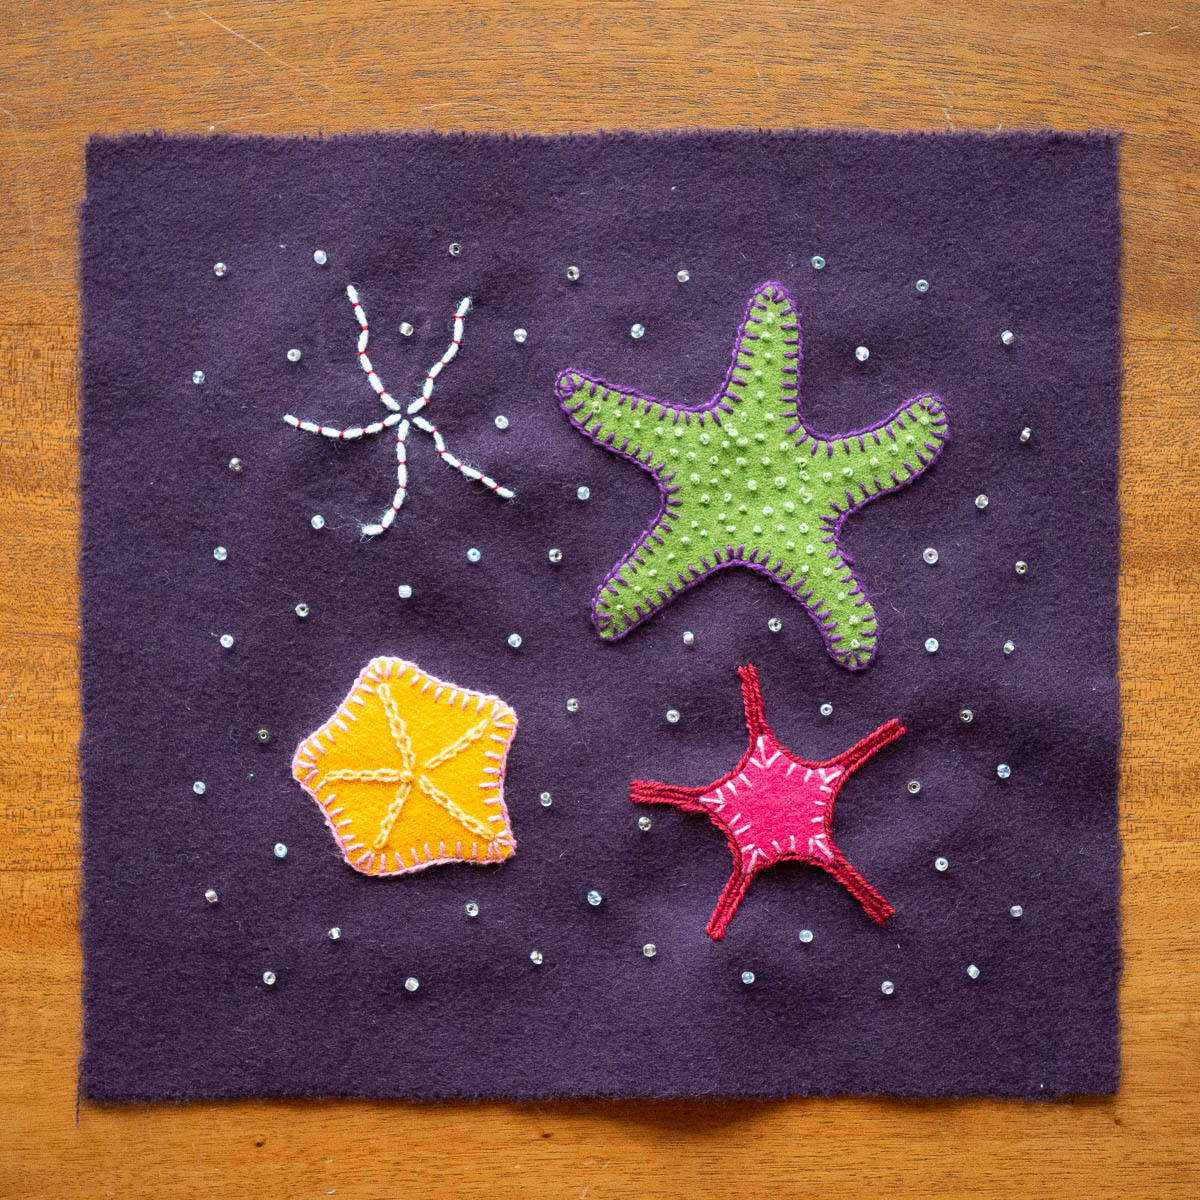
Starfishes, more or less as I had envisaged them.

The second session of the embroidery workshop will be tomorrow and will deal with finishing and making something of your embroidery. I’ve been working on mine so that I can be done with the actual embroidering by then.

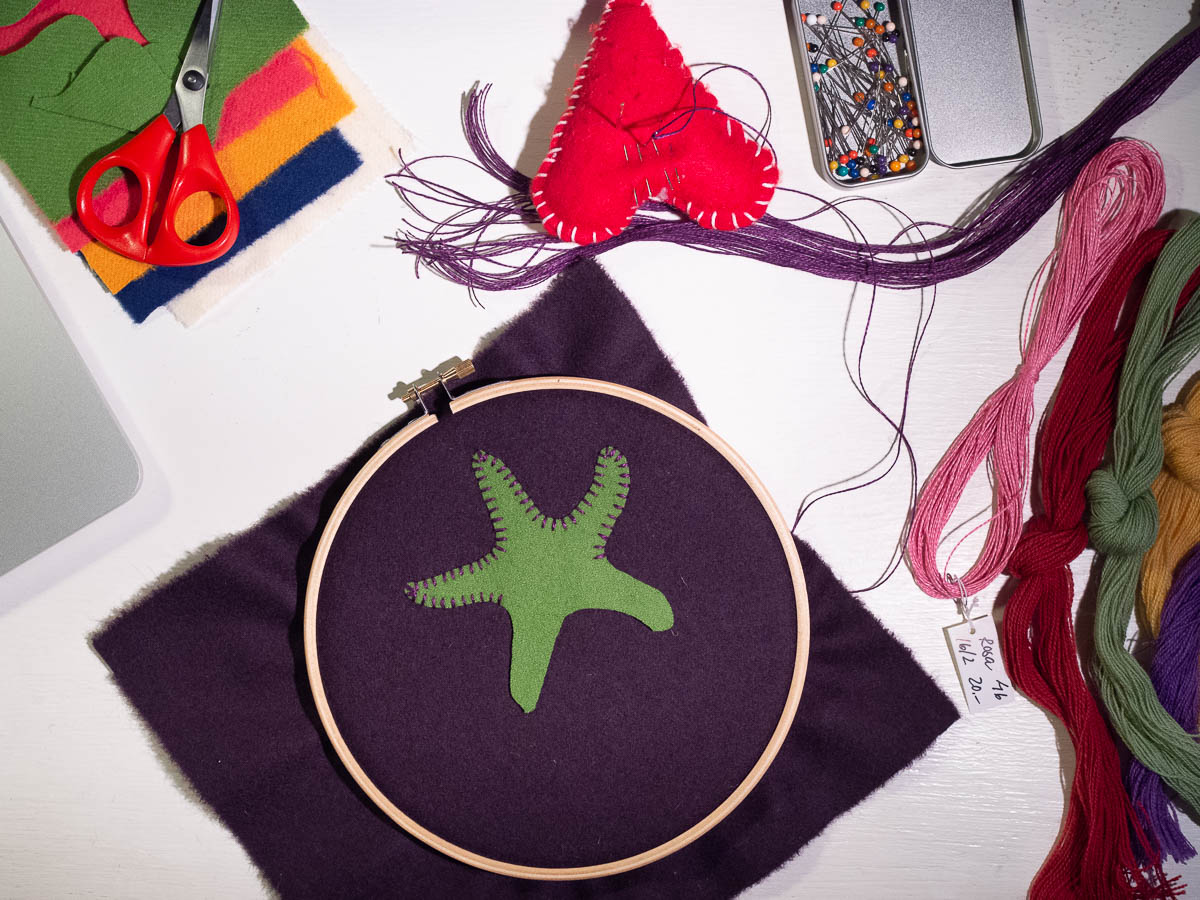
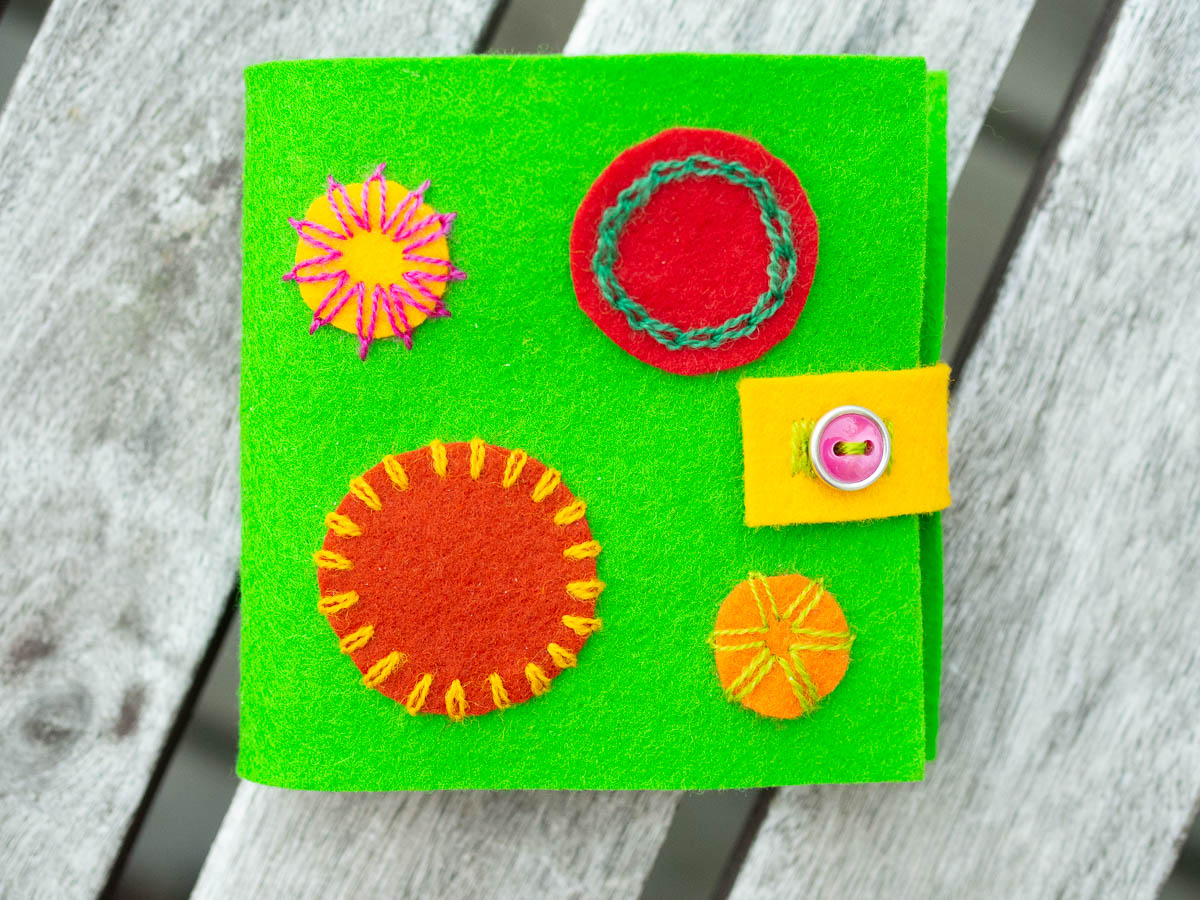
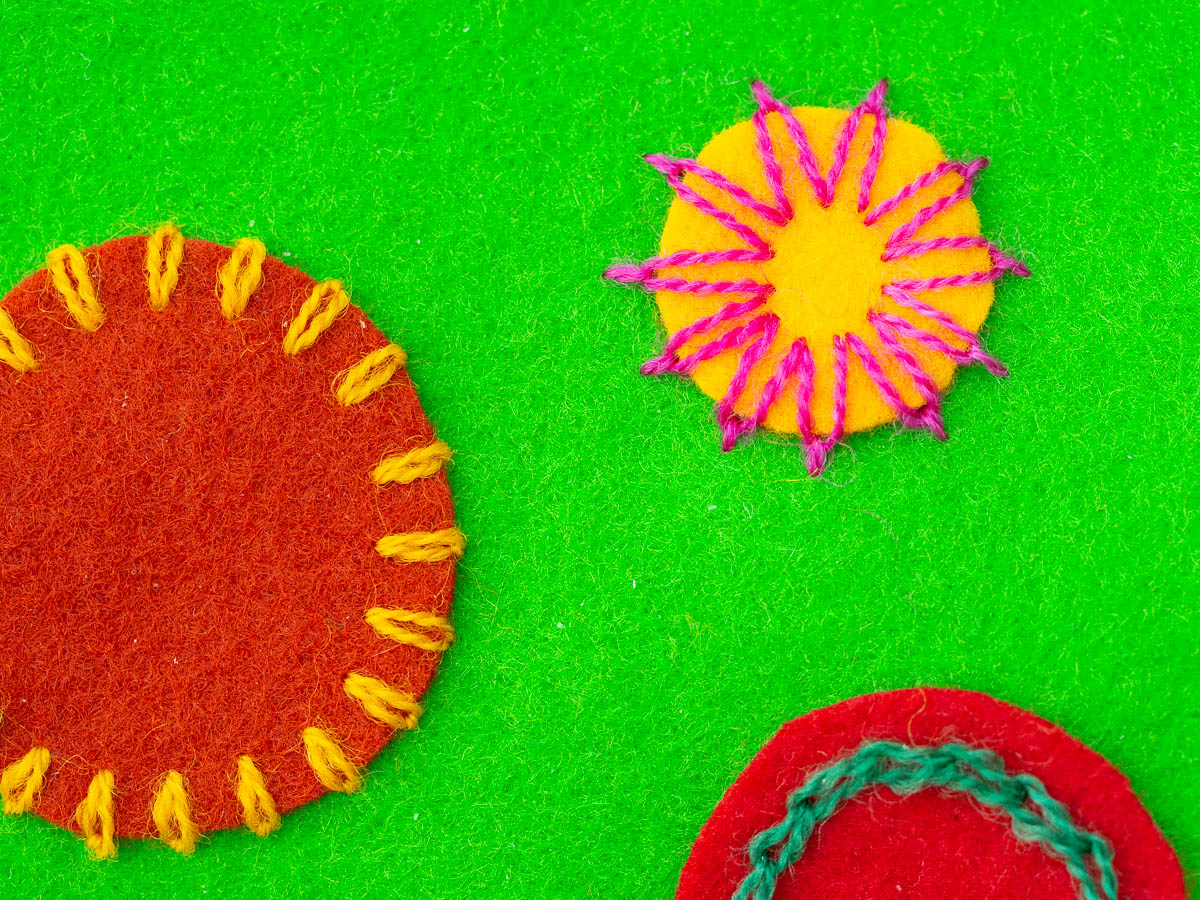
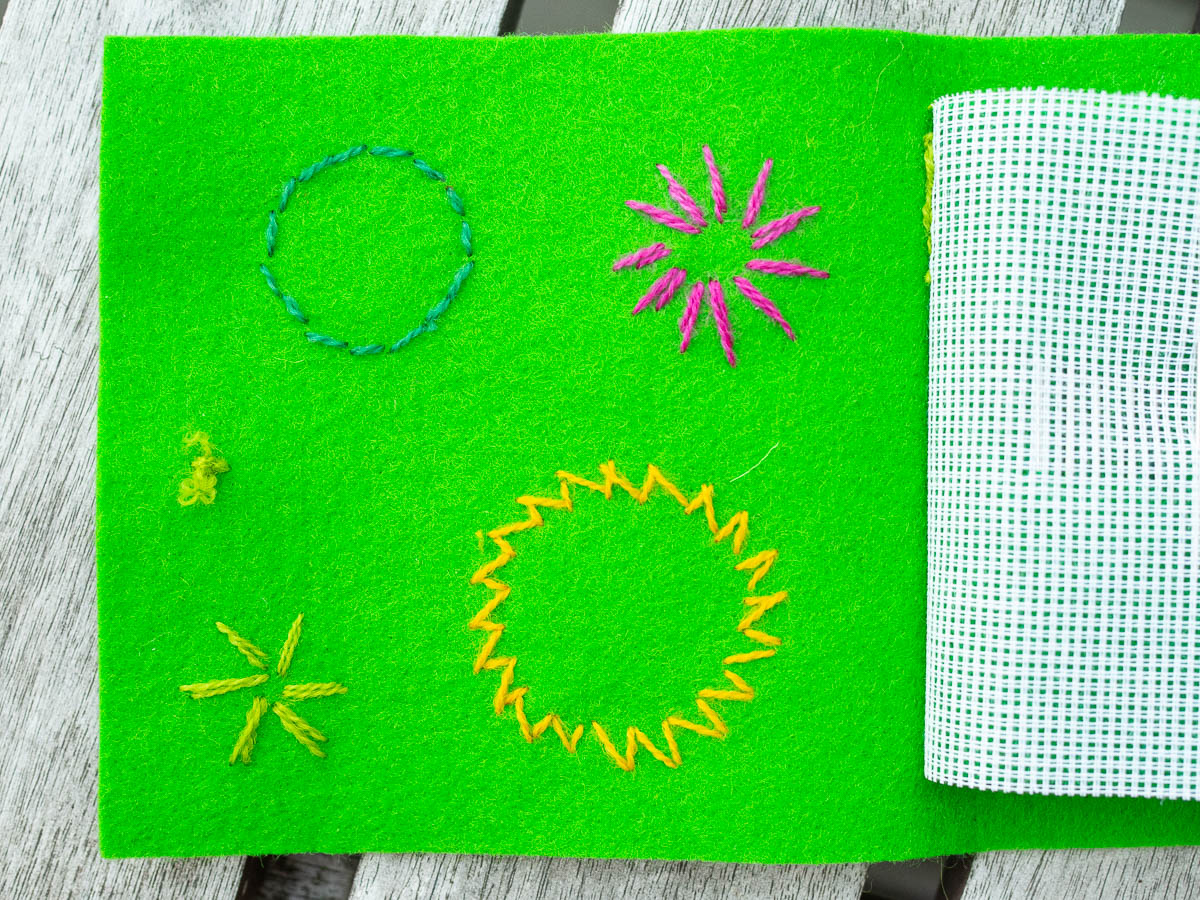
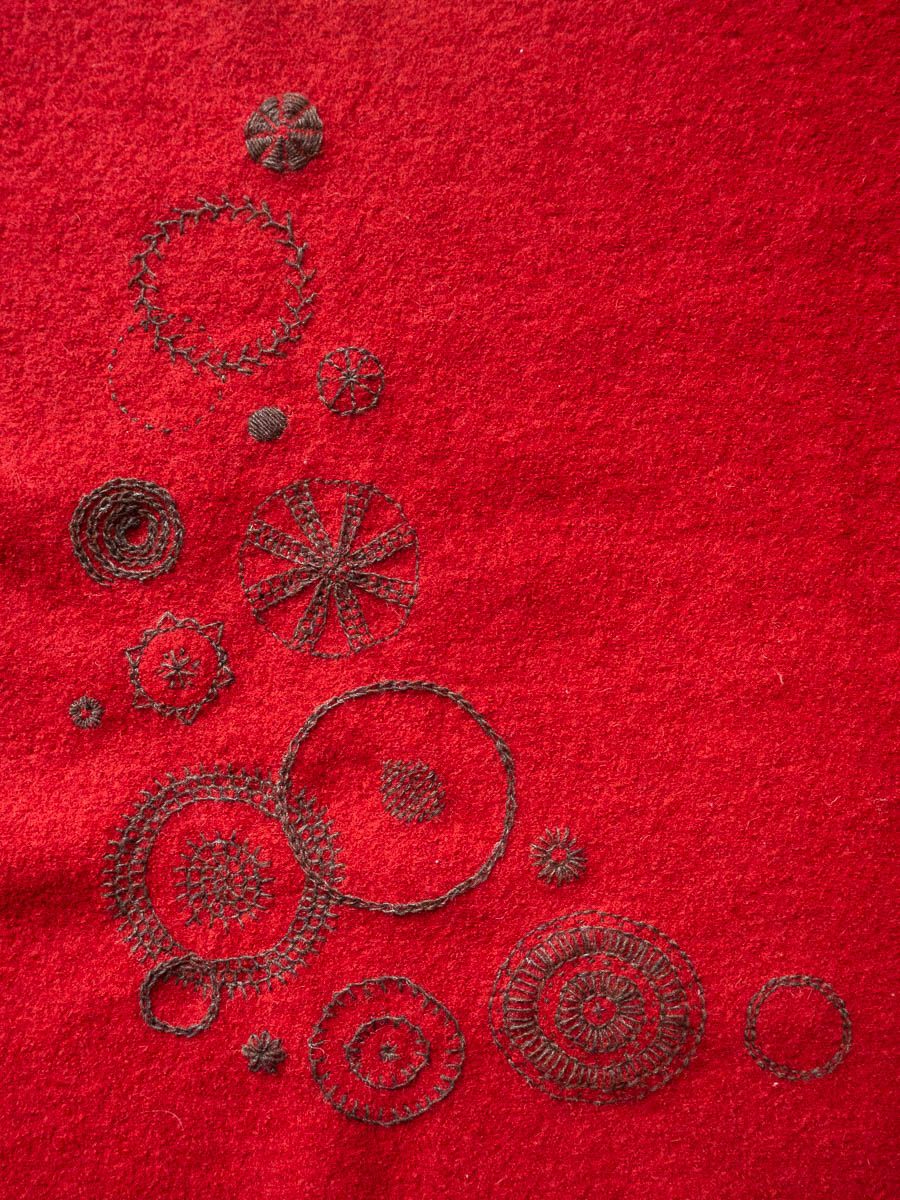
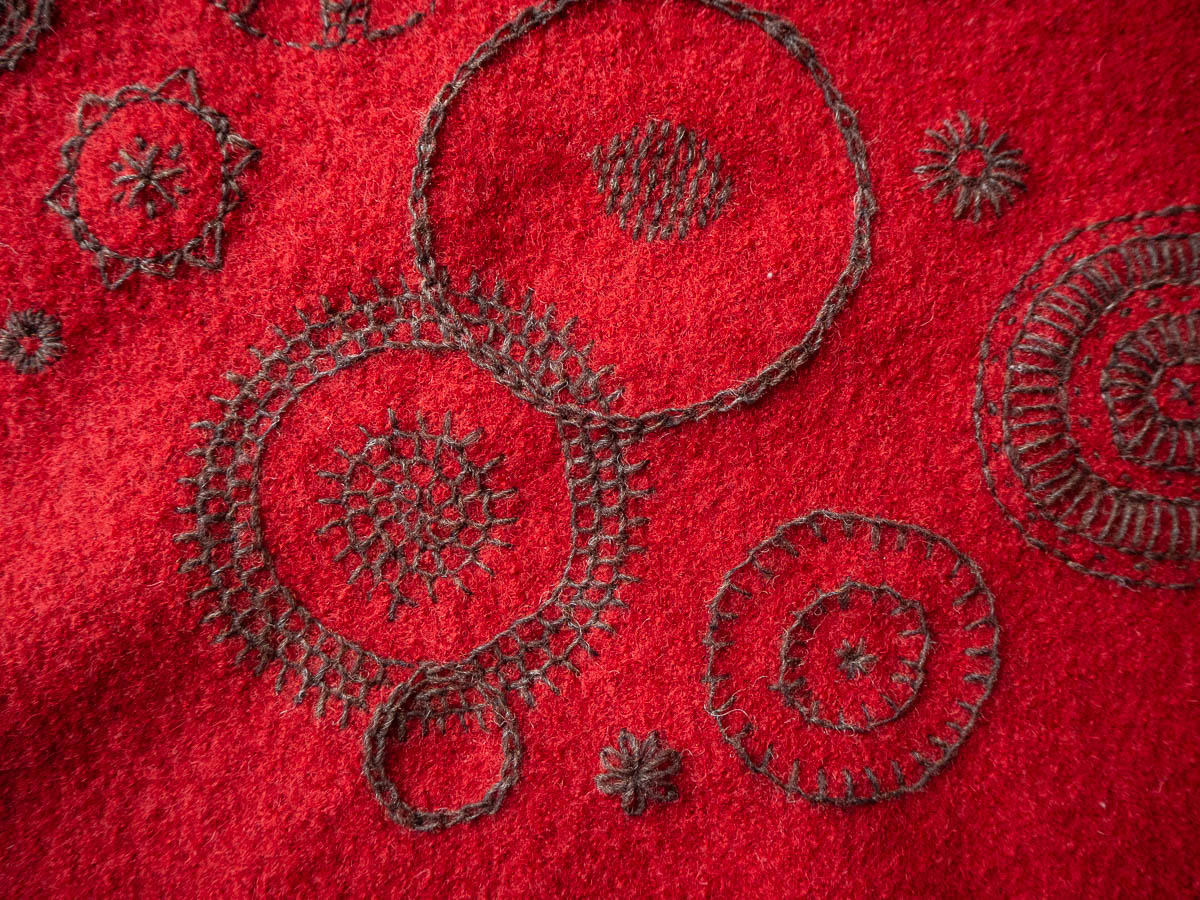
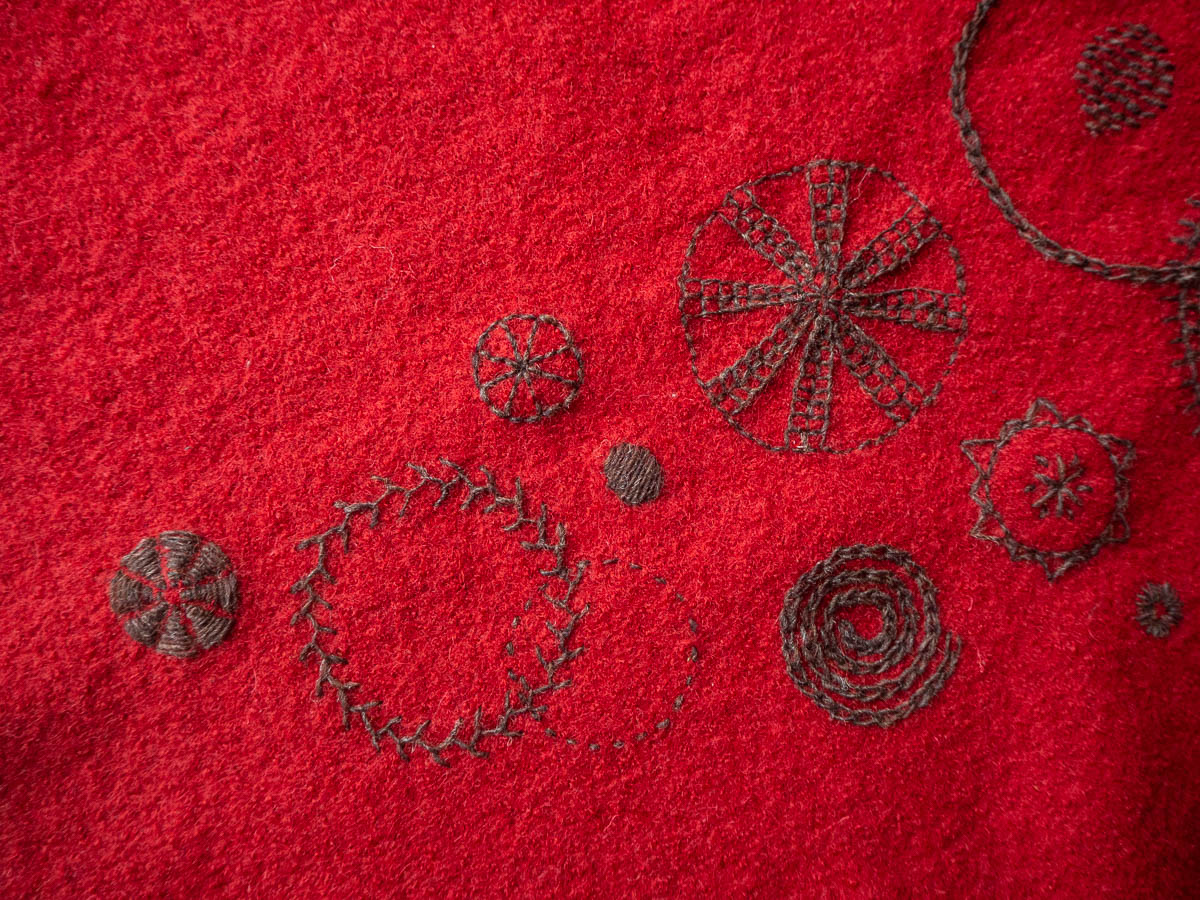
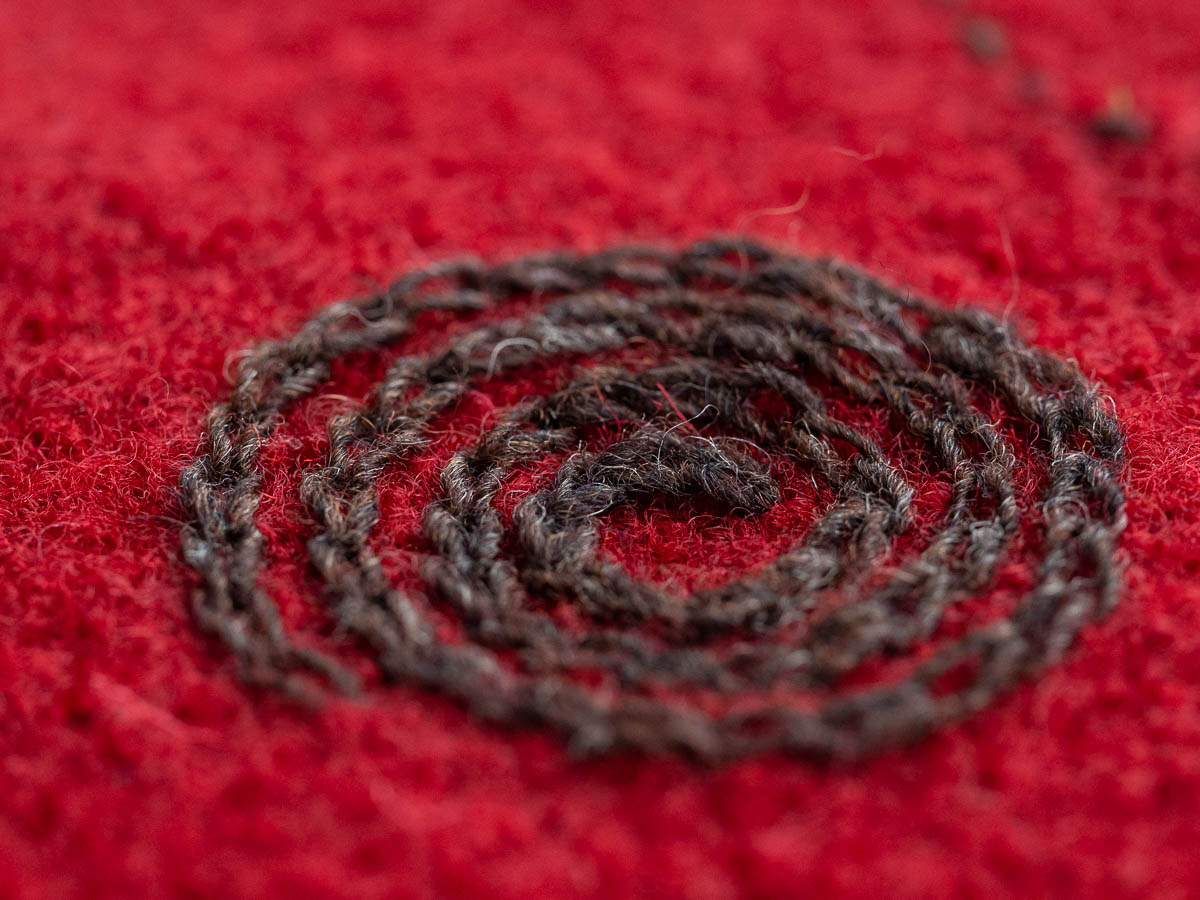
Since this was supposed to be a learning opportunity, I tried to use not just familiar stitches (running stitch, whip stitch and chain stitch) but also some that I rarely use (stem stitch) and some that I have seen but never tried myself (couching and French knots).

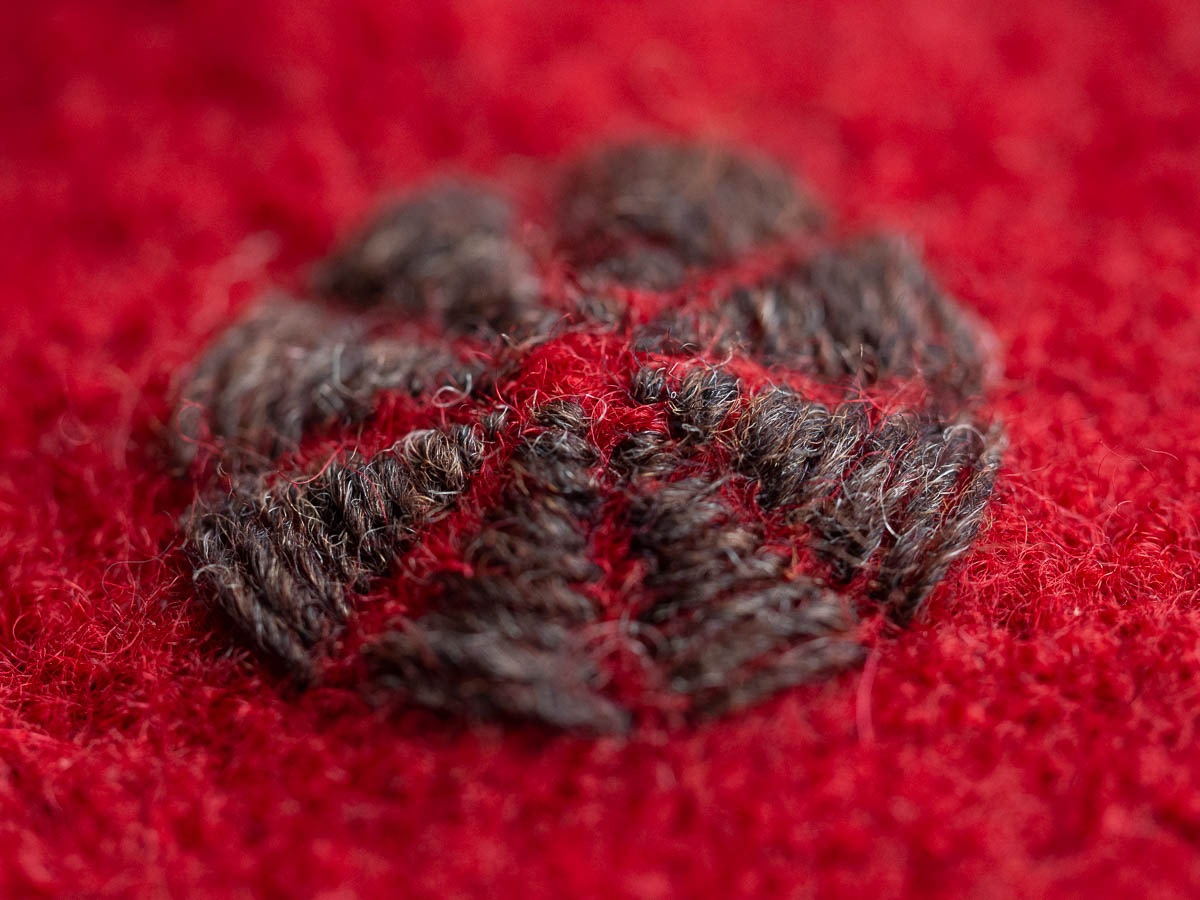
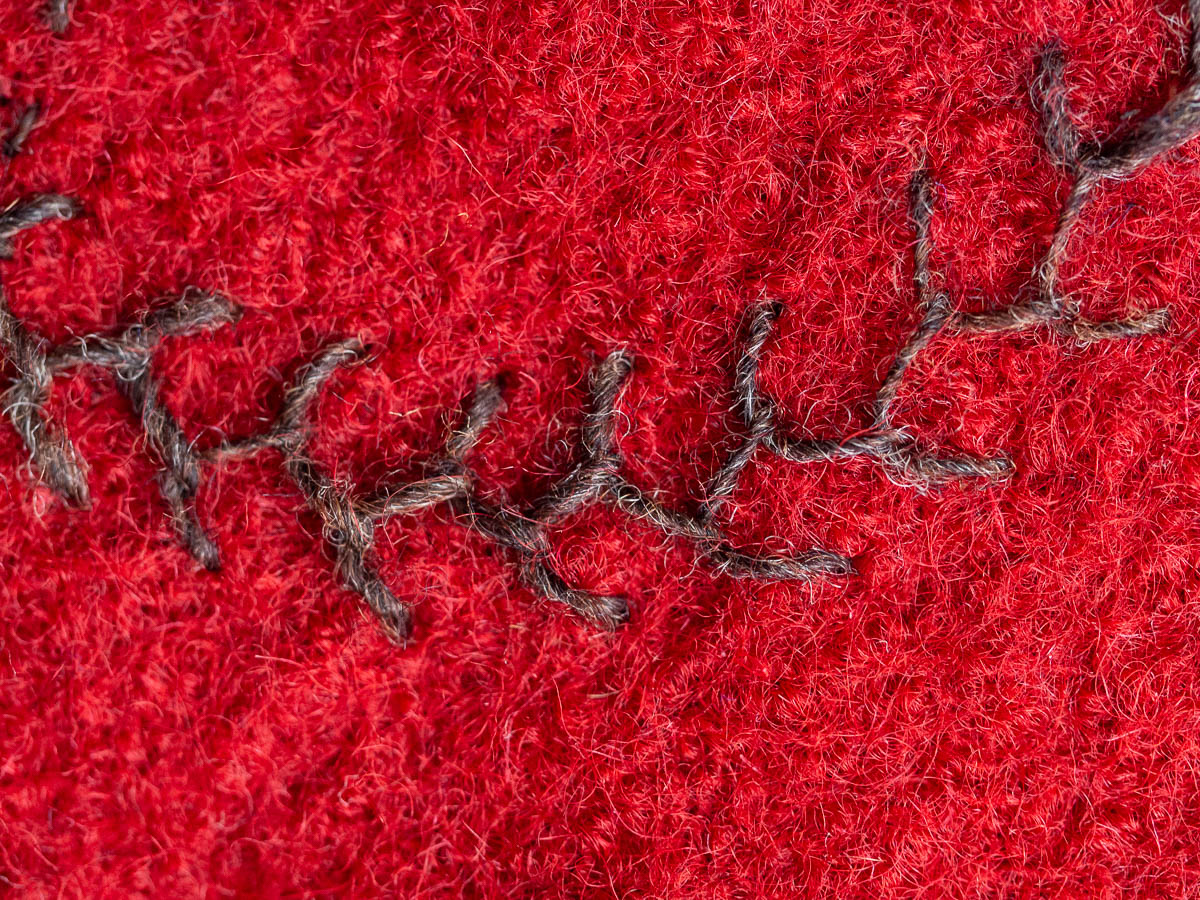
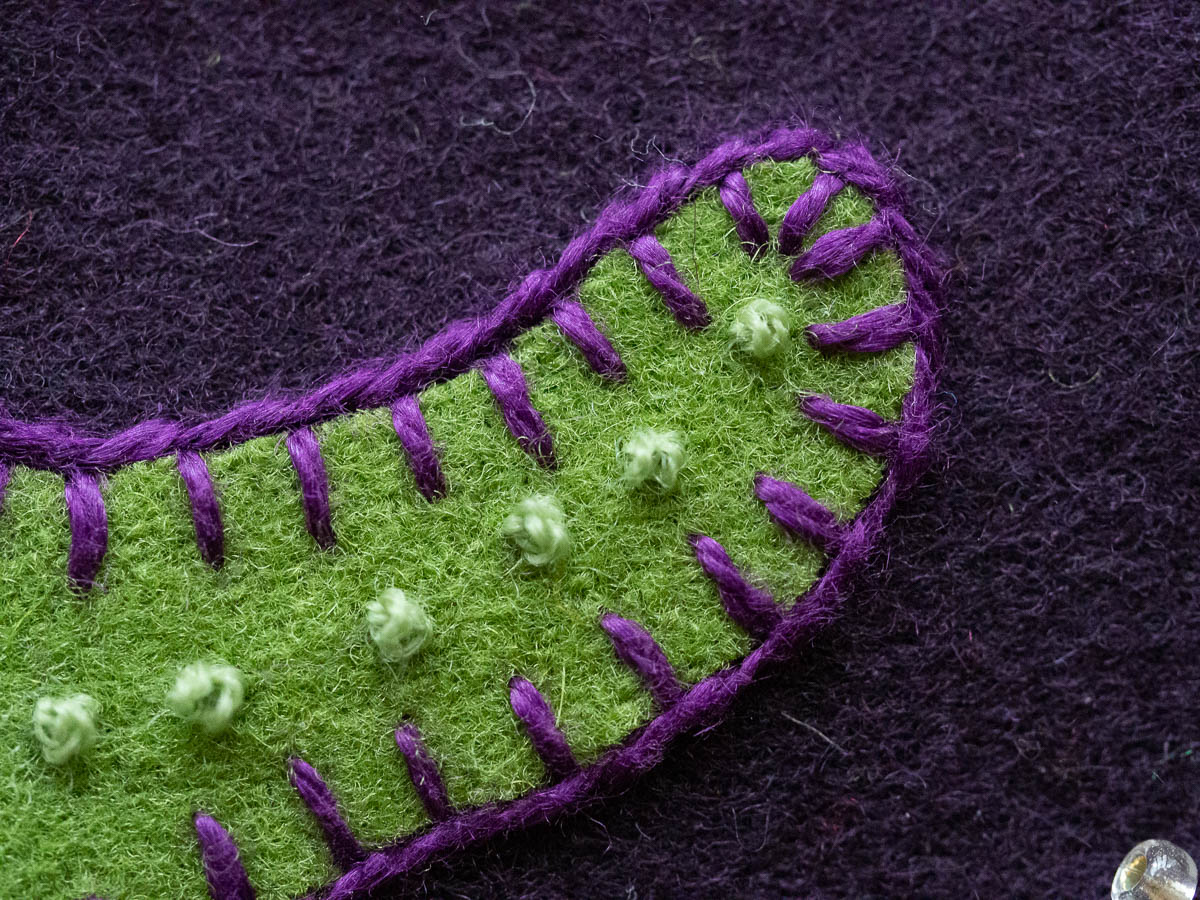
Couching was as easy as it looked. That’s what I used for the thin white starfish with small red stitches at the top left. French knots are the small wart-like things on the green starfish. Not difficult per se, but I need more practice to get them really even and tight.

When I had finished the starfishes, I thought the design as a whole was still lacking something. I had four separate starfishes rather than one coherent design. I thought of adding seaweeds, but decided on small seed pearls. They’re like water bubbles sparkling in the sun.

The stem stitch framing around the edges of the starfishes came out really nice, crisp and distinct. This is my new favourite technique and I don’t think I will be using blanket stitch for appliques much from now on.

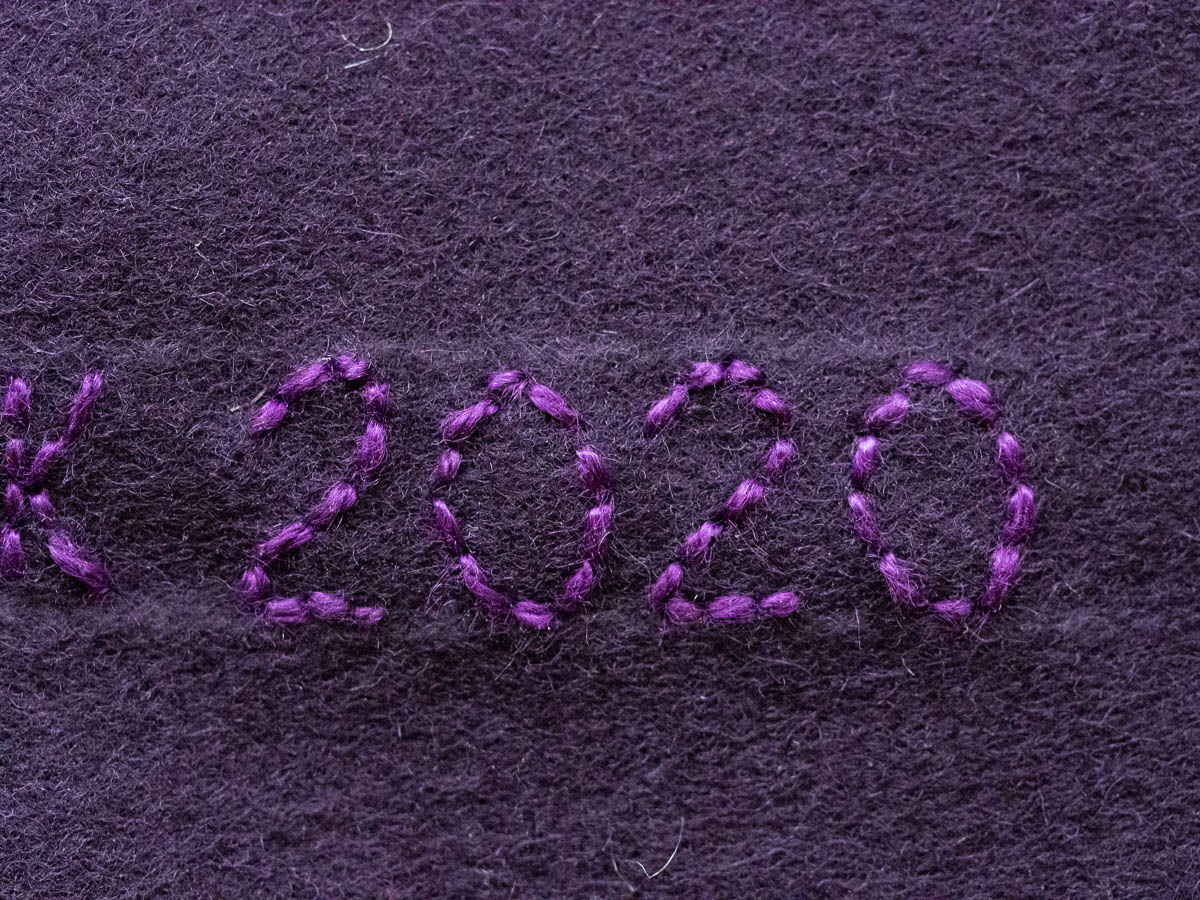
One of my embroidery books encouraged readers to sign their embroideries. It’s a tradition in older works to put the maker’s initials and the year somewhere. I saw this advice when I had already filled the background with pearls and had no suitable place for signing. But the piece of cloth that will become the back of the bag/pouch thing (which I intend to make of this) is all empty, so I decided to sign the back instead.

It’s funny to imagine someone finding this many decades from now. Maybe I’ll give it away and the recipient tires of it and gives it to charity. Maybe I die and someone inherits it and then gifts it to someone else. And then at some point someone discovers it and starts digging into its history and writes a school project about it. Or a blog post, or whatever takes the place of blog posts a hundred years from now. “The materials are of Swedish manufacture and the design is clearly inspired by Swedish traditions, but the embroidery is signed with an Estonian name, very intriguing!”


The first of two embroidery workshop sessions took place today, and I started working on my starfish design. I’ve done embroidery before and I was familiar with all the stitches we went through, but still learned new things.

The most useful trick I learned today is to sew applique designs not with blanket stitch but with whip stitch, and then work stem stitch or backstitch around the edge. It’s faster, more stable, and looks more even. Whenever I sew blanket stitch along a curve – and most appliques tend to have curved shapes – the stitches always tend to slip, no matter how careful I am with the thread tension. I never have any problems with whip stitch. Plus stem stitch is thicker and stands out more than blanket stitch, so the whole applique becomes more distinct and gets more depth this way. I loved this.

I also got to try out some new materials. The materials kit contained pieces of felted wool cloth (vadmal) in various colours, wool thread and linen thread. I hadn’t worked with vadmal before, or with linen thread. I quite liked the look of shiny, sleek linen thread on matte wool fabric.

An embroidery workshop in Swedish is probably not relevant for you all, but in case you are interested, the workshop was held by Tamme Craft. The name “Tamme” is Estonian, which is what caught my eye to begin with. It turned out that the company is run by a lady with Estonian roots.

Please excuse the atrocious lighting in the photo. It’s so dark here that I have to turn on all available lamps for embroidery.


I bought myself an early Christmas gift in the form of an online wool embroidery workshop. I need some new impressions and a break from the never-ending sameness.

The workshop package included a bag of materials and also a suggested design. Traditional Swedish wool embroidery designs tend to have a lot of hearts and flowers which seems rather dull and “been there, done that” so I wanted something more interesting.

The larger traditional embroideries often include animals such as birds and horses. I don’t feel any particular affinity with birds or horses, so I went looking for some other cool animal, and decided to embroider starfishes. They’re like flowers, but cooler. Especially when you go beyond the most well-known species.

The first of the two workshop meetings is already tomorrow so I’m sitting up late, sketching starfishes.


The napkin project is progressing nicely. I’ve ripped the seams along that crocheted ribbon, cut each napkin in four pieces, hemmed them all, and started embroidering.

The embroidery is a bit of an inside joke inspired by the name of the street we live in. I went with a very informal style, free-hand sketching each large star (so they all ended up slightly different and slightly wonky) and then improvising the smaller ones as I sewed. Each napkin will be different, so to reinforce that individuality I’m embroidering each one in a different colour.

Due to my Soviet childhood, I have a somewhat complicated relationship with five-pointed stars. These ones are different enough from the Soviet stars to feel OK, though. The wonky shapes help. But the red one is definitely going to be a dark red and not a “Soviet” red.


(Eric and Adrian are away visiting friends for a few days. Ingrid is at home but sleeps past noon and then spends much of the day up in her room. So I have oodles of time for sewing right now.)

1. Sewed the buttons onto my cardigan. The buttonholes are tiny (even though I did follow the pattern instructions to the dot) so I had to make really small buttons, and still they’re quite fiddly to get through the holes. Either the buttonholes will stretch a bit with time, or I might end up not using them much.

I’m glad the cardigan is done and I can start using it when autumn comes.

2. Painted the second coat on the garden sofa. Looking good!

It looks like some spots (not in the photo) may need a third coat. The old dark blue colour is shining through a bit, because my first coat of paint didn’t adhere well. I guess I wasn’t aggressive enough with the sandpaper.

3. Sewed a needle book for rarely used and reserve needles. We have a pin cushion for the three or four needles we use most often for ordinary sewing, but all the others have been in their factory packaging (which is not made for long term storage and tends to fall apart with time) or stuck into loose pieces of paper or fabric. Now they’re all tidily stored: small needles, large needles, blunt-tipped embroidery needles of various sizes, and cutting point leather needles.

To be honest, tidying up the needles was just an excuse. It’s not been a high priority on my list. It really was just a way to find something small and useful to do with embroidery. I like small projects – a larger project can turn from fun into a must, but a small one that I can finish in one sitting is pure fun.

Wool felt is such a wonderful crafts material! It feels nice to the touch, it’s durable and dirt-resistant, and it is so easy to work with because it doesn’t fray. I bought a bunch of felt pieces for my advent calendar in 2011 and I still have some scraps left of that stash in odd colours. That’s actually why this needle book ended up being in green as well – I only had large enough pieces of felt in a few colours, and only the greens harmonized with each other. I was getting a bit fed up with all the green today so I compensated with extra colourful decorations not in green.


The embroidery is all chain stitch and detached chain stitch. I’m pretty pleased with how tidy I managed to keep the rear side of the front cover. I could have gone all fancy and added a lining to hide it but (a) I don’t want the added bulk, and (b) I like the raw edges.


I’m starting to look forward to my spring ski tour at the end of March, and thinking about the kit I’ve missed during my previous hikes and trips. A sewing kit was one of them.

Hence today’s mini craft project: a travel sewing kit/mini needle book from mixed scraps of fabric.

The needle book obviously holds a few needles in different sizes. The orange pockets behind the felt flaps have pieces cardboard with sewing thread in a few colours and thicknesses. I’ll be adding safety pins as soon as I’ve bought some; it turns out that we have very few left. Somehow safety pins seem to be a consumable even though I can’t remember ever throwing one away.

I also hope to find small, light-weight, blunt-ended scissors somewhere. Embroidery scissors are small but have sharp tips, so I’m afraid they would poke holes in this thing.


I’m all done with my embroidered circles!

Eighteen circles in total, counting circle-within-circle as one when the inner and outer circle form part of the same design, and as two when they are separate designs.


When I look at the whole design, it makes me think of a map of constellations, or the symbols on a Sami drum.

There is the Web, and the Coiled Chain, and the Fence. And the Big Wheel, the Little Wheel and the Dark Wheel. The Sun Flower, and the Little Flower. The Crow’s Tracks, and the Little Black Thing.


It’s all simple stitches: running stitch, backstitch, chain stitch, and blanket stitch, with some satin stitch and some freeform no-name stitching. This last one is called feather stitch in English, but when I learned it in Estonian we called it “crow’s feet stitch” (varesejalapiste) and that’s how I think of it.


I am adding more circles to my skirt.

I’ve never embroidered with wool before. It feels nice, but it is also kind of challenging. Wool is scratchy, so the yarn tends to get tangled up more than I’m used to. And this yarn is surprisingly fragile. When I get a knot and try to unpick it with my fingers, I sometimes end up unpicking the yarn itself. I’ve also broken it several times just by trying to pull my stitches tight. Some stitches can be looser, but blanket stitch has to be tight or it goes all crooked.


I’ve started on the embroidery on my skirt-to-be and it is coming along nicely.


The first skirt turned out nice so I started on another one. This one will be bolder, in bright red and with embroidery on the front. Same stretchy wool fabric as the first one.

What to embroider, though? That was the difficult question.

Definitely nothing corny like hearts or butterflies or flowers. Vines or leaves, like ivy maybe? No, I have a green skirt that I also want to pimp up, and leaves and vines would look better in green than in red.

An animal of some kind, like the lizard towel I made for my brother? There are lots of cool, clever animals – dragons and cats and ravens and octopuses and elephants. The problem with putting an animal in such a prominent position, though, is that it becomes a statement. (Does in my head, at least.) Cats, for example, are nice – but I don’t care so much about them that I would want my only bold skirt to be a cat skirt. And they’re all a bit cliché as well, somehow, to be personal. Especially since I cannot draw well enough to draw them from scratch. I’d have to google for a picture to start from, and then it would be like wearing clip art on my skirt.

Anything even vaguely symbolic has the same problem. All of it has been appropriated by fashion designers, so it wouldn’t feel mine. I love Celtic knotwork designs, for example, and doodled some of my own many years ago. But now everybody and their dog has a knotwork tattoo.

Something completely abstract, then? Yes.

Circles. Circles are common in both traditional Estonian and Swedish embroidery, which feels fitting. Less common than flowers, but common enough that I’ll be able to find some inspiration. Circles it’ll be.

This decision was followed by lots of experimenting with cardboard circles. I like tangible design tools, digital sketching is not for me.

Like this? Fewer? Larger? More filled or more empty?