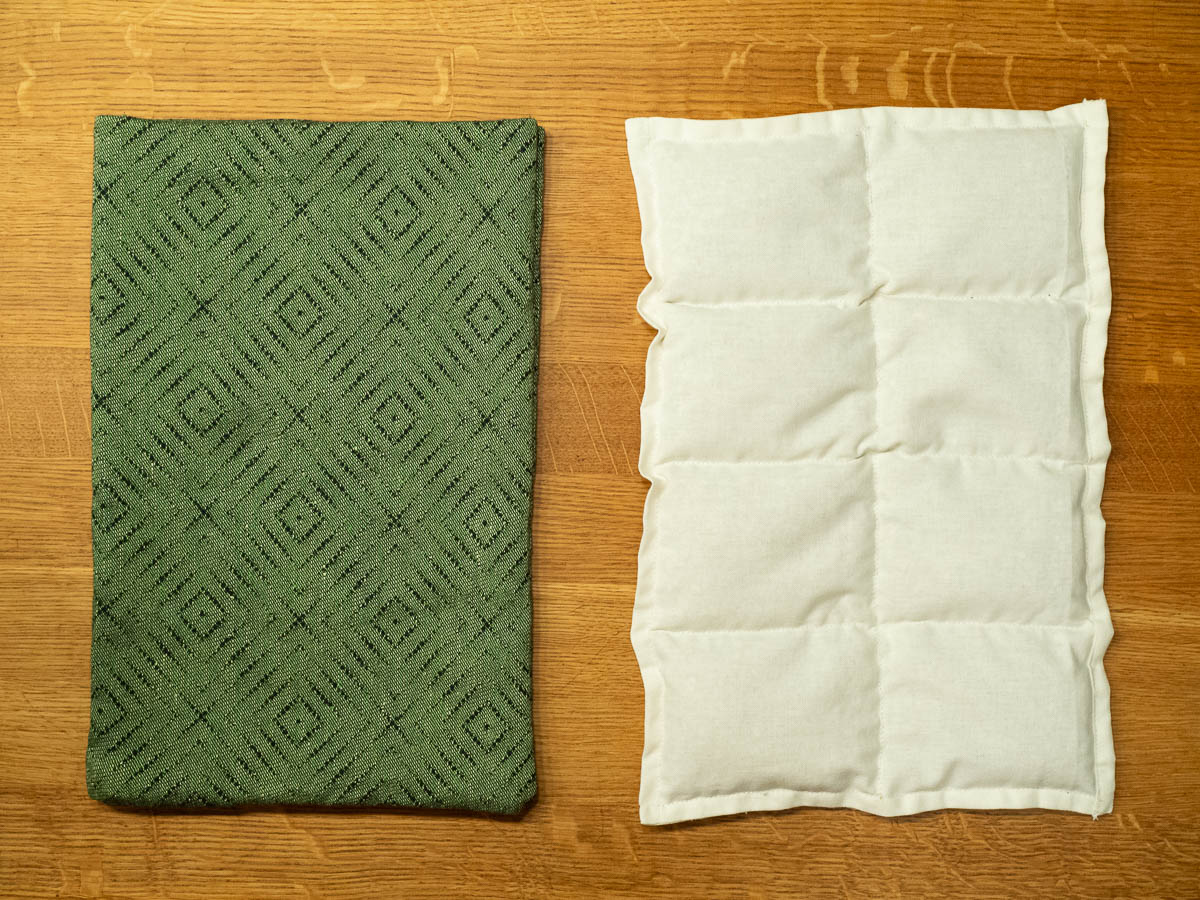
I sewed a wheat warmer. Both because I wanted one, and because this seemed like a good first project to actually make friends with the new sewing machine. (The first attempt didn’t get me very far.) A wheat warmer is small and simple, has nothing but straight seams, and doesn’t involve any challenging fabrics.
The outer covering is a barely-used towel that I think we got as a gift. I like the look of the fabric, and it’s thick and nice. It went a few rounds in the kitchen but I was always disappointed in its inability to dry things – it’s a 50/50 cotton/linen mix, and I’ve come to expect the absorbing power of pure linen. Then it spent some years in my fabric stash, and now it got a second life, to which it is much better suited.
For the inner pillow I cut up a storage bag that came with a pair of upmarket shoes. And the filling is plain barley.
Learning point (obvious in hindsight): The final measurements of the pillow are smaller than the cut measurements, even when I’ve properly calculated and measured the seam allowances, because the filling puffs it up and pulls it in. I was aiming for a slightly larger pillow. But it’s good enough. Much better than the store-bought one I had before, which wasn’t divided into pockets, so all the filling immediately ended up at one end, no matter how I held it.
I struggled with the sewing machine. So much. The bottom thread kept breaking all the time. I’d start, and sew five or six centimetres, only to discover that the thread has broken again, and rip it out and start over. Or I’d make it as far as 15 out of 30 centimetres, and then – too far from the edge to rip it all out – skip back and stitch over the last bit again.
Finally I figured out that this (only?) happened after I stopped and started. Obviously there’s a start at the edge, but I’d also stop at each pin to take it out, because I didn’t want to sew over them, and then of course I start again. Somehow at each stop-and-start the tension of the bottom thread goes wonky and it gets tangled around the bobbin axis and then of course it breaks.
With more experimentation I noticed that the problem didn’t happen if I managed to stop with the needle properly in the down position. You’d want to do that anyway for turning corners and such, not for the sake of the machine but to keep the fabric in place. For just taking out a pin it normally wouldn’t matter much. Except on this machine it clearly does.
Then I realized that the important bit was not the stopping but the starting. If I “take off” with the needle in the optimal position (all the way down) then I guess the bobbin thread gets the right tension from the start and doesn’t break. Otherwise it gets tangled for some reason.
That meant it didn’t matter so much if I couldn’t always manage to stop at the exact right moment. (I need more practice with the foot pedal for that kind of precision timing.) When I happened to stop with the needle not down, I could hand-wheel the last little bit to get the needle where the machine wanted it to be, do whatever I needed with the pins or what not, and then I and the machine would be in position for a good start.
Even though I now have a way around the problem, it’s still rather annoying to have to be so persnickety about the needle position. This doesn’t seem entirely normal, and the user manual says nothing about this kind of behaviour. But I guess I’ll live with it. We’re maybe not friends yet, but sort of getting there.
Leave a comment